

Vine ripened East Texas tomatoes are abundant right now. What better use than your homemade ketchup?
One of my favorite comics when I was in college was “Shoe.” In one of the strips Cosmo is at Roz’s diner getting a salad. Roz asks Cosmo what type of dressing he preferred. His response was “American Dressing” whereupon Roz handed him a bottle of ketchup. You see, Americans are in love with ketchup. I don’t know how it started, when or why but we are. You find it on almost everything from eggs, fries, burgers, hot dogs, sandwiches of all varieties, people use it as the base for cocktail sauce and barbecue sauce, hash browns, grilled cheese sandwiches, the list goes on and on. It’s amazing at its many uses.
Now, I am not and never have been a huge ketchup fan. It does, however, have its uses. I like it on hash browns, fries, tater tots, and sometimes on grilled cheese sandwiches. That’s about it. Regardless, it’s hard (in fact, almost impossible) to eat a burger and fries without ketchup on my fries. So, last year when reading the Bartolini Kitchens, John did a post on Ketchup. It definitely caught my attention because I make all sorts of condiments from mayonnaise to stone ground mustard of differing varieties to pickles and hot sauces. Never having made ketchup but intrigued by his recipe I decided I would attempt my hand at ketchup once fresh tomatoes were in season. Well, the vine ripened tomatoes are here so there was no better time than the present to try my hand at Ketchup. Following John’s recipe with minor modification, this is what we did.
Ingredients
- 6 lbs. vine ripened East Texas tomatoes, roughly chopped
- 4 medium onions, chopped
- 1 red bell pepper, chopped
- 2 small, homegrown, green bell peppers, chopped
- 3 homegrown Serrano peppers, halved
- 4 homegrown, red jalapeños, chopped
- 4 garlic cloves, peeled and smashed
- 3/4 cup cider vinegar
- 3/4 cup dark brown sugar
- 1/2 tsp powdered yellow mustard
- 2 cinnamon sticks
- 1-1/2 tsp whole cloves
- 1-1/2 tsp whole allspice
- 1-1/2 tsp celery seeds
- 1-1/2 tsp smoked paprika
- 1-1/2 tbsp black peppercorns
- 2 bay leaves
- salt, to taste

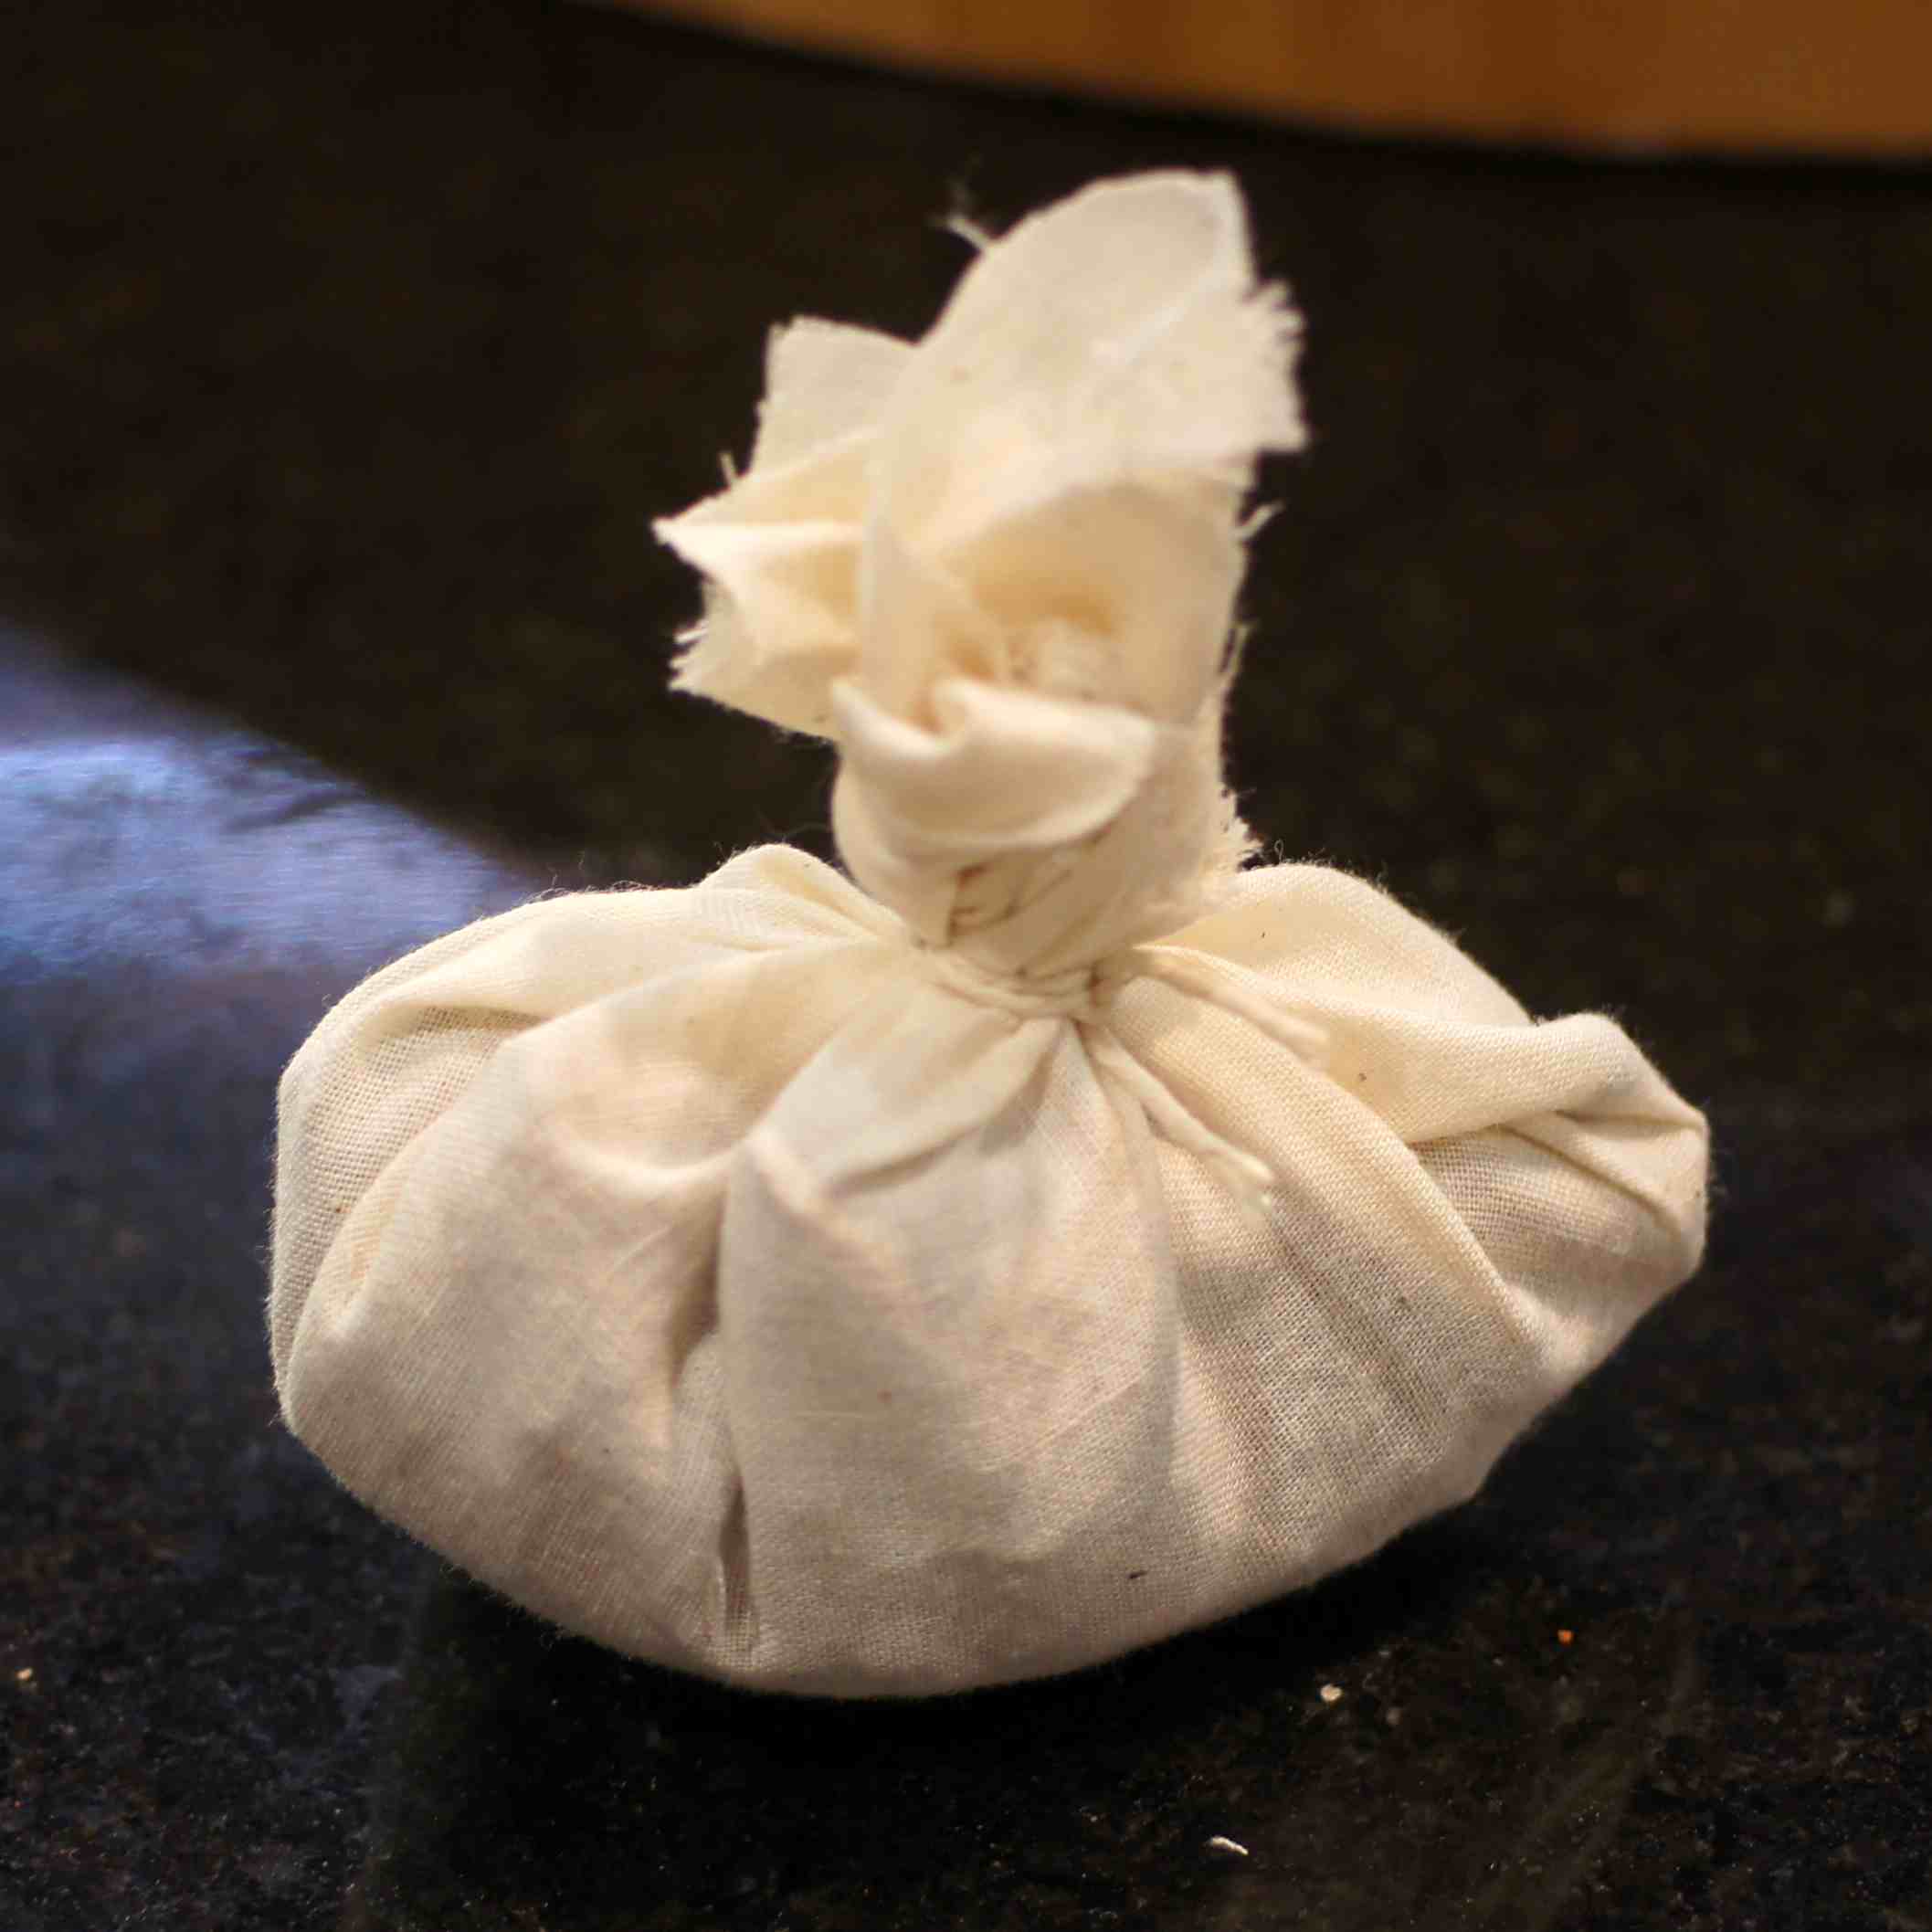
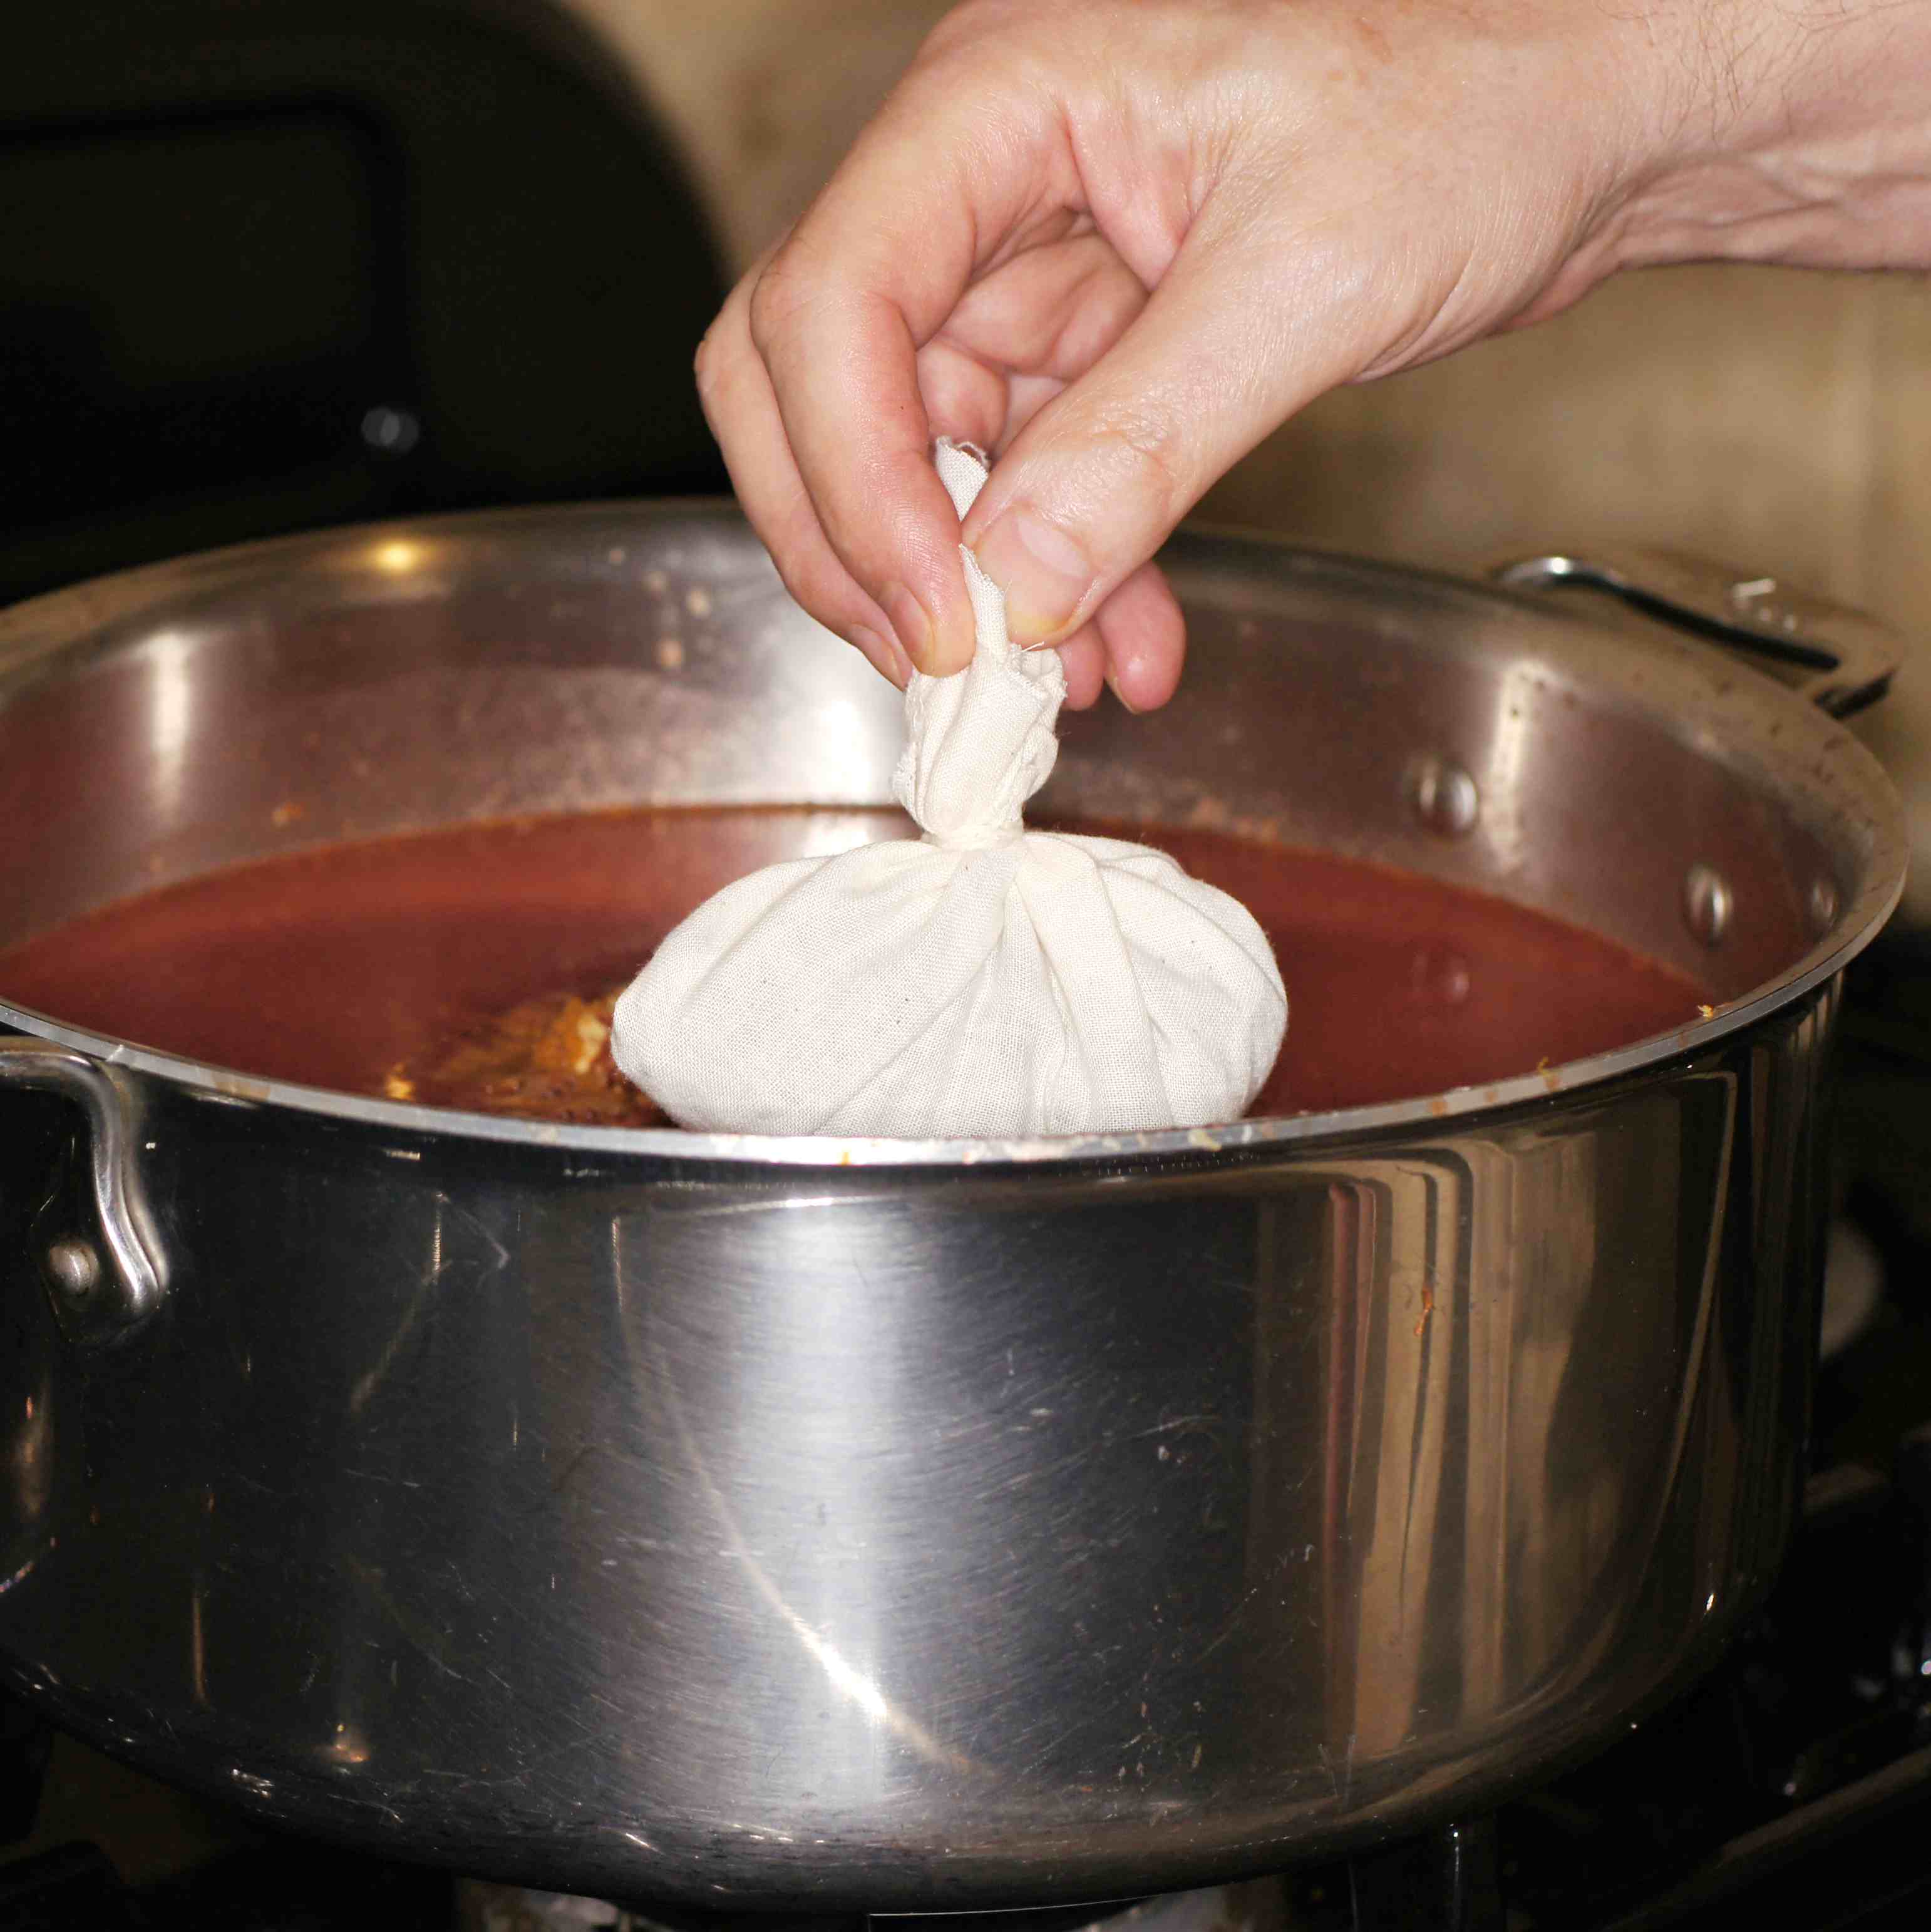
Instruction Use a piece of cheese cloth to form a pouch into which you’ll add the cinnamon sticks, allspice, cloves, celery seeds, peppercorns, and bay leaves.

Use butcher string to enclose and securely tie the herbs & spices. Set aside.
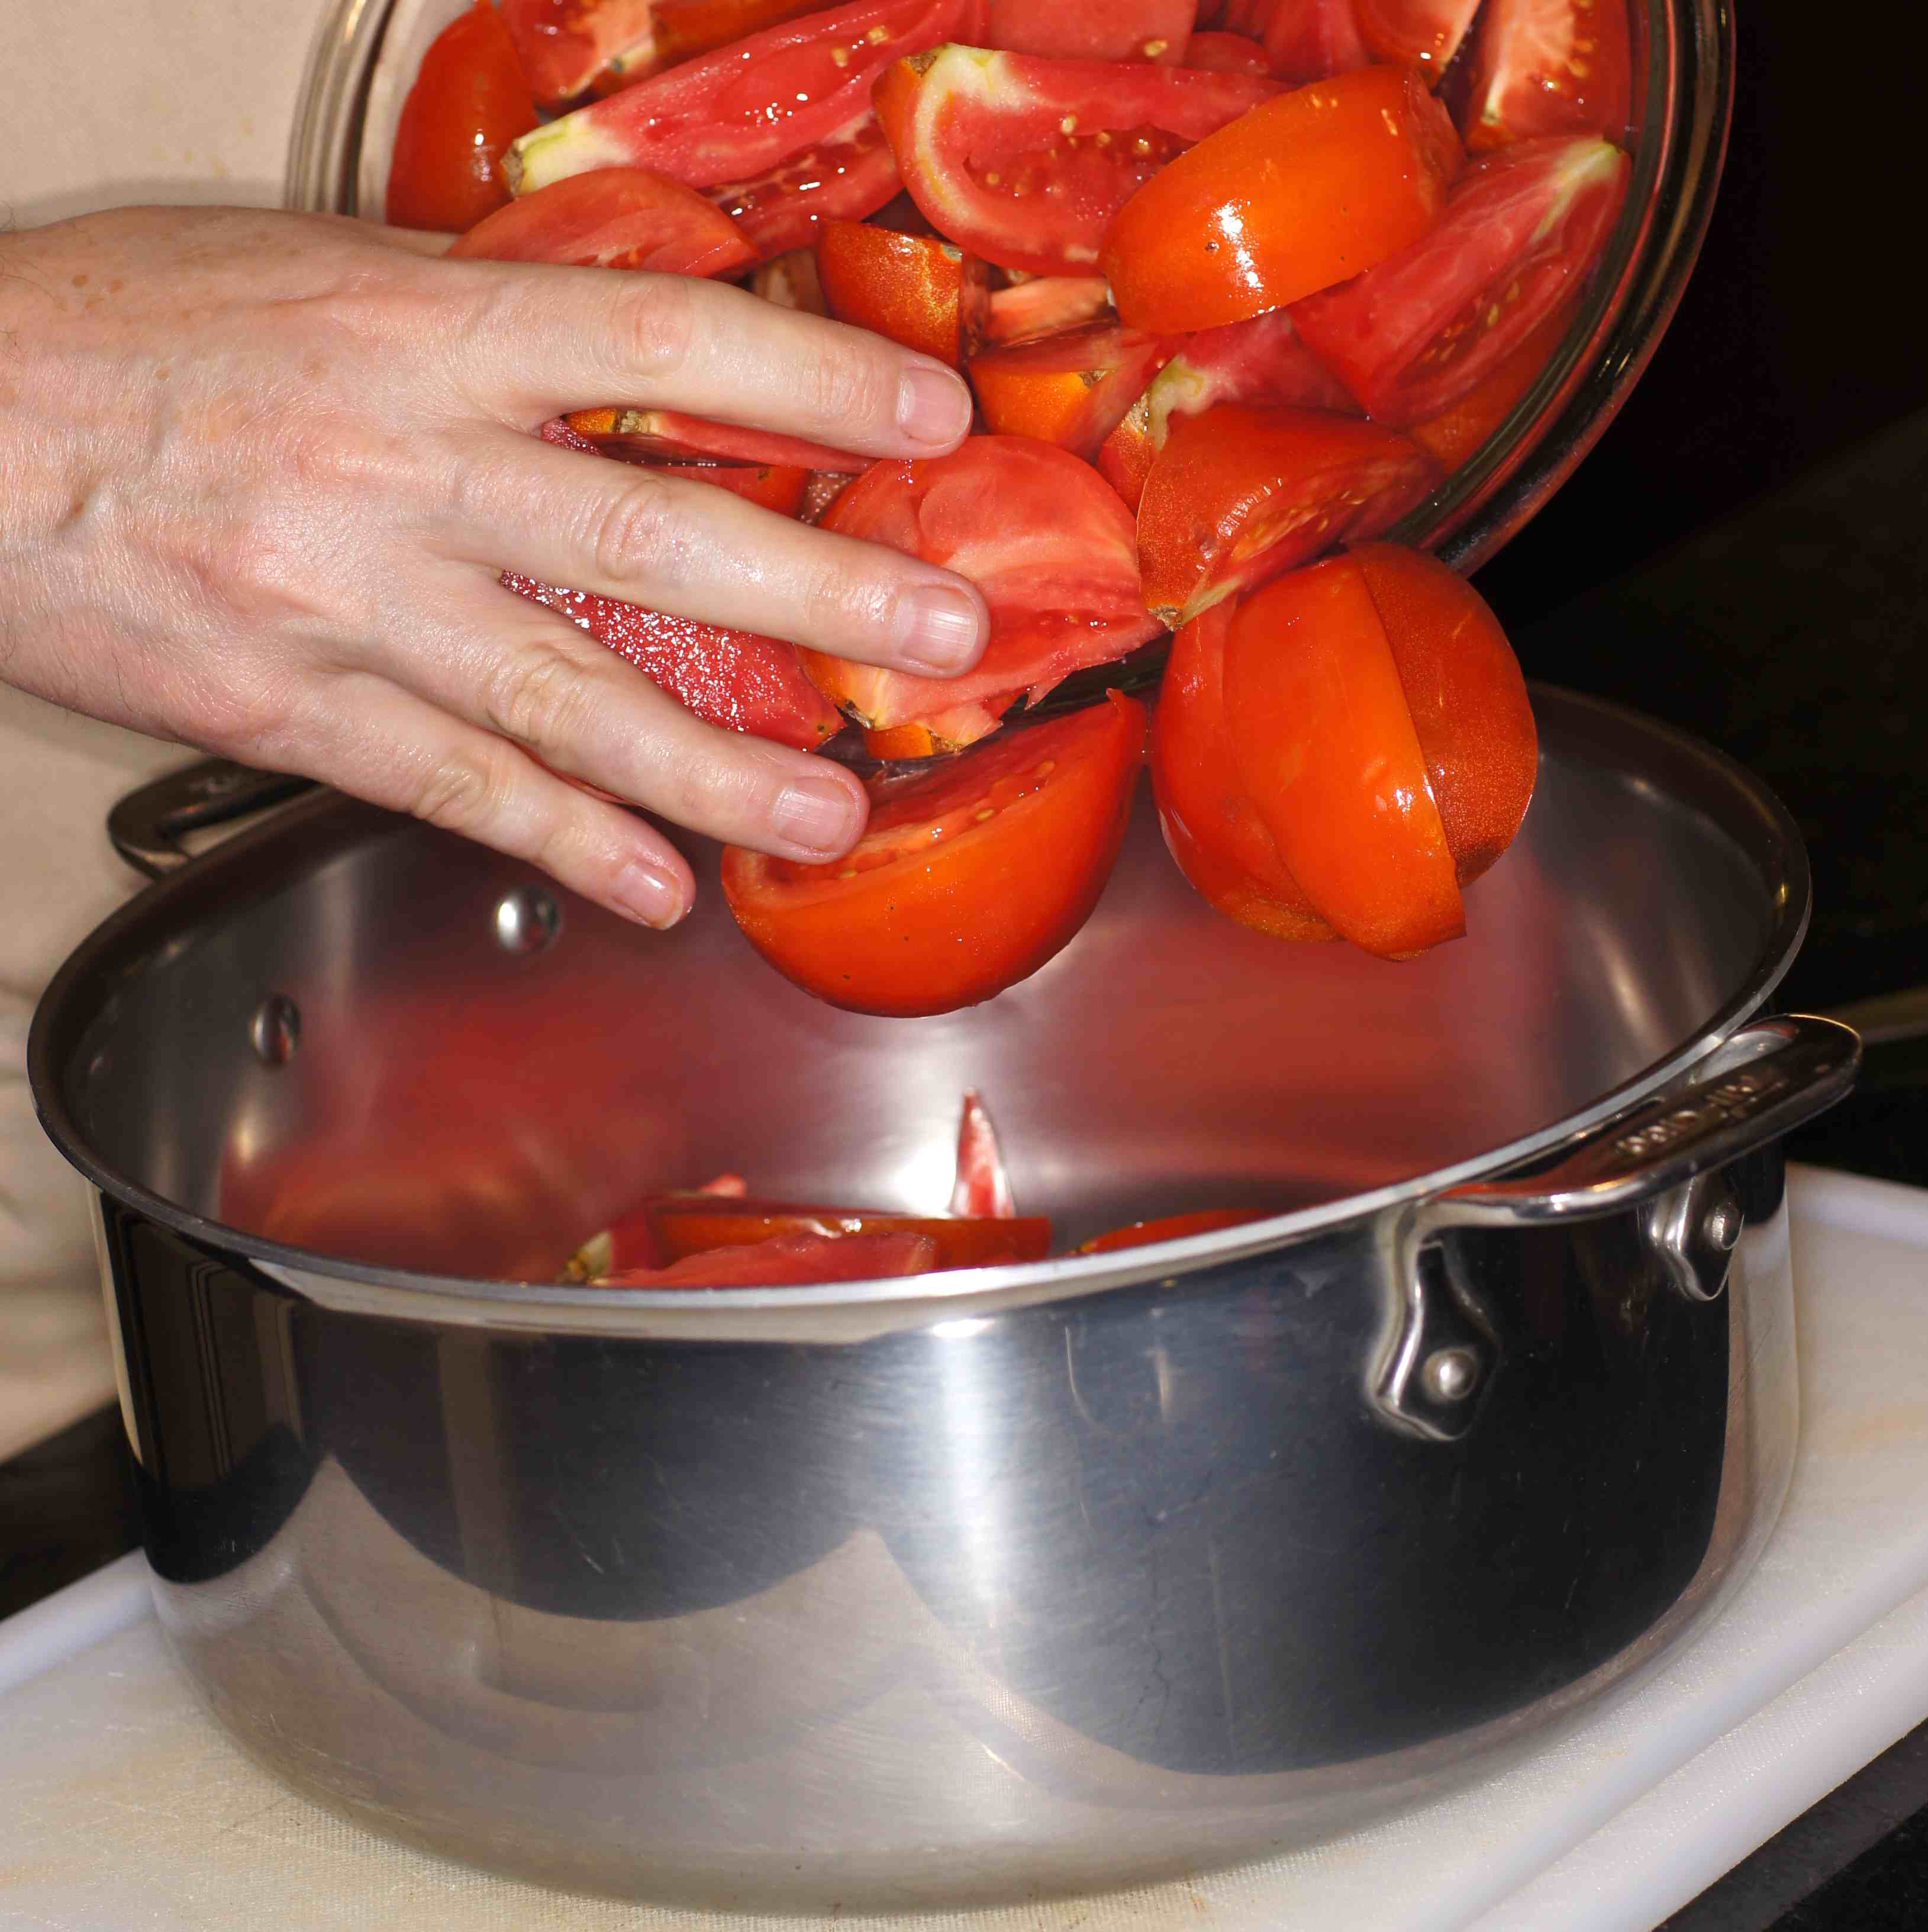
Put the tomatoes,
garlic

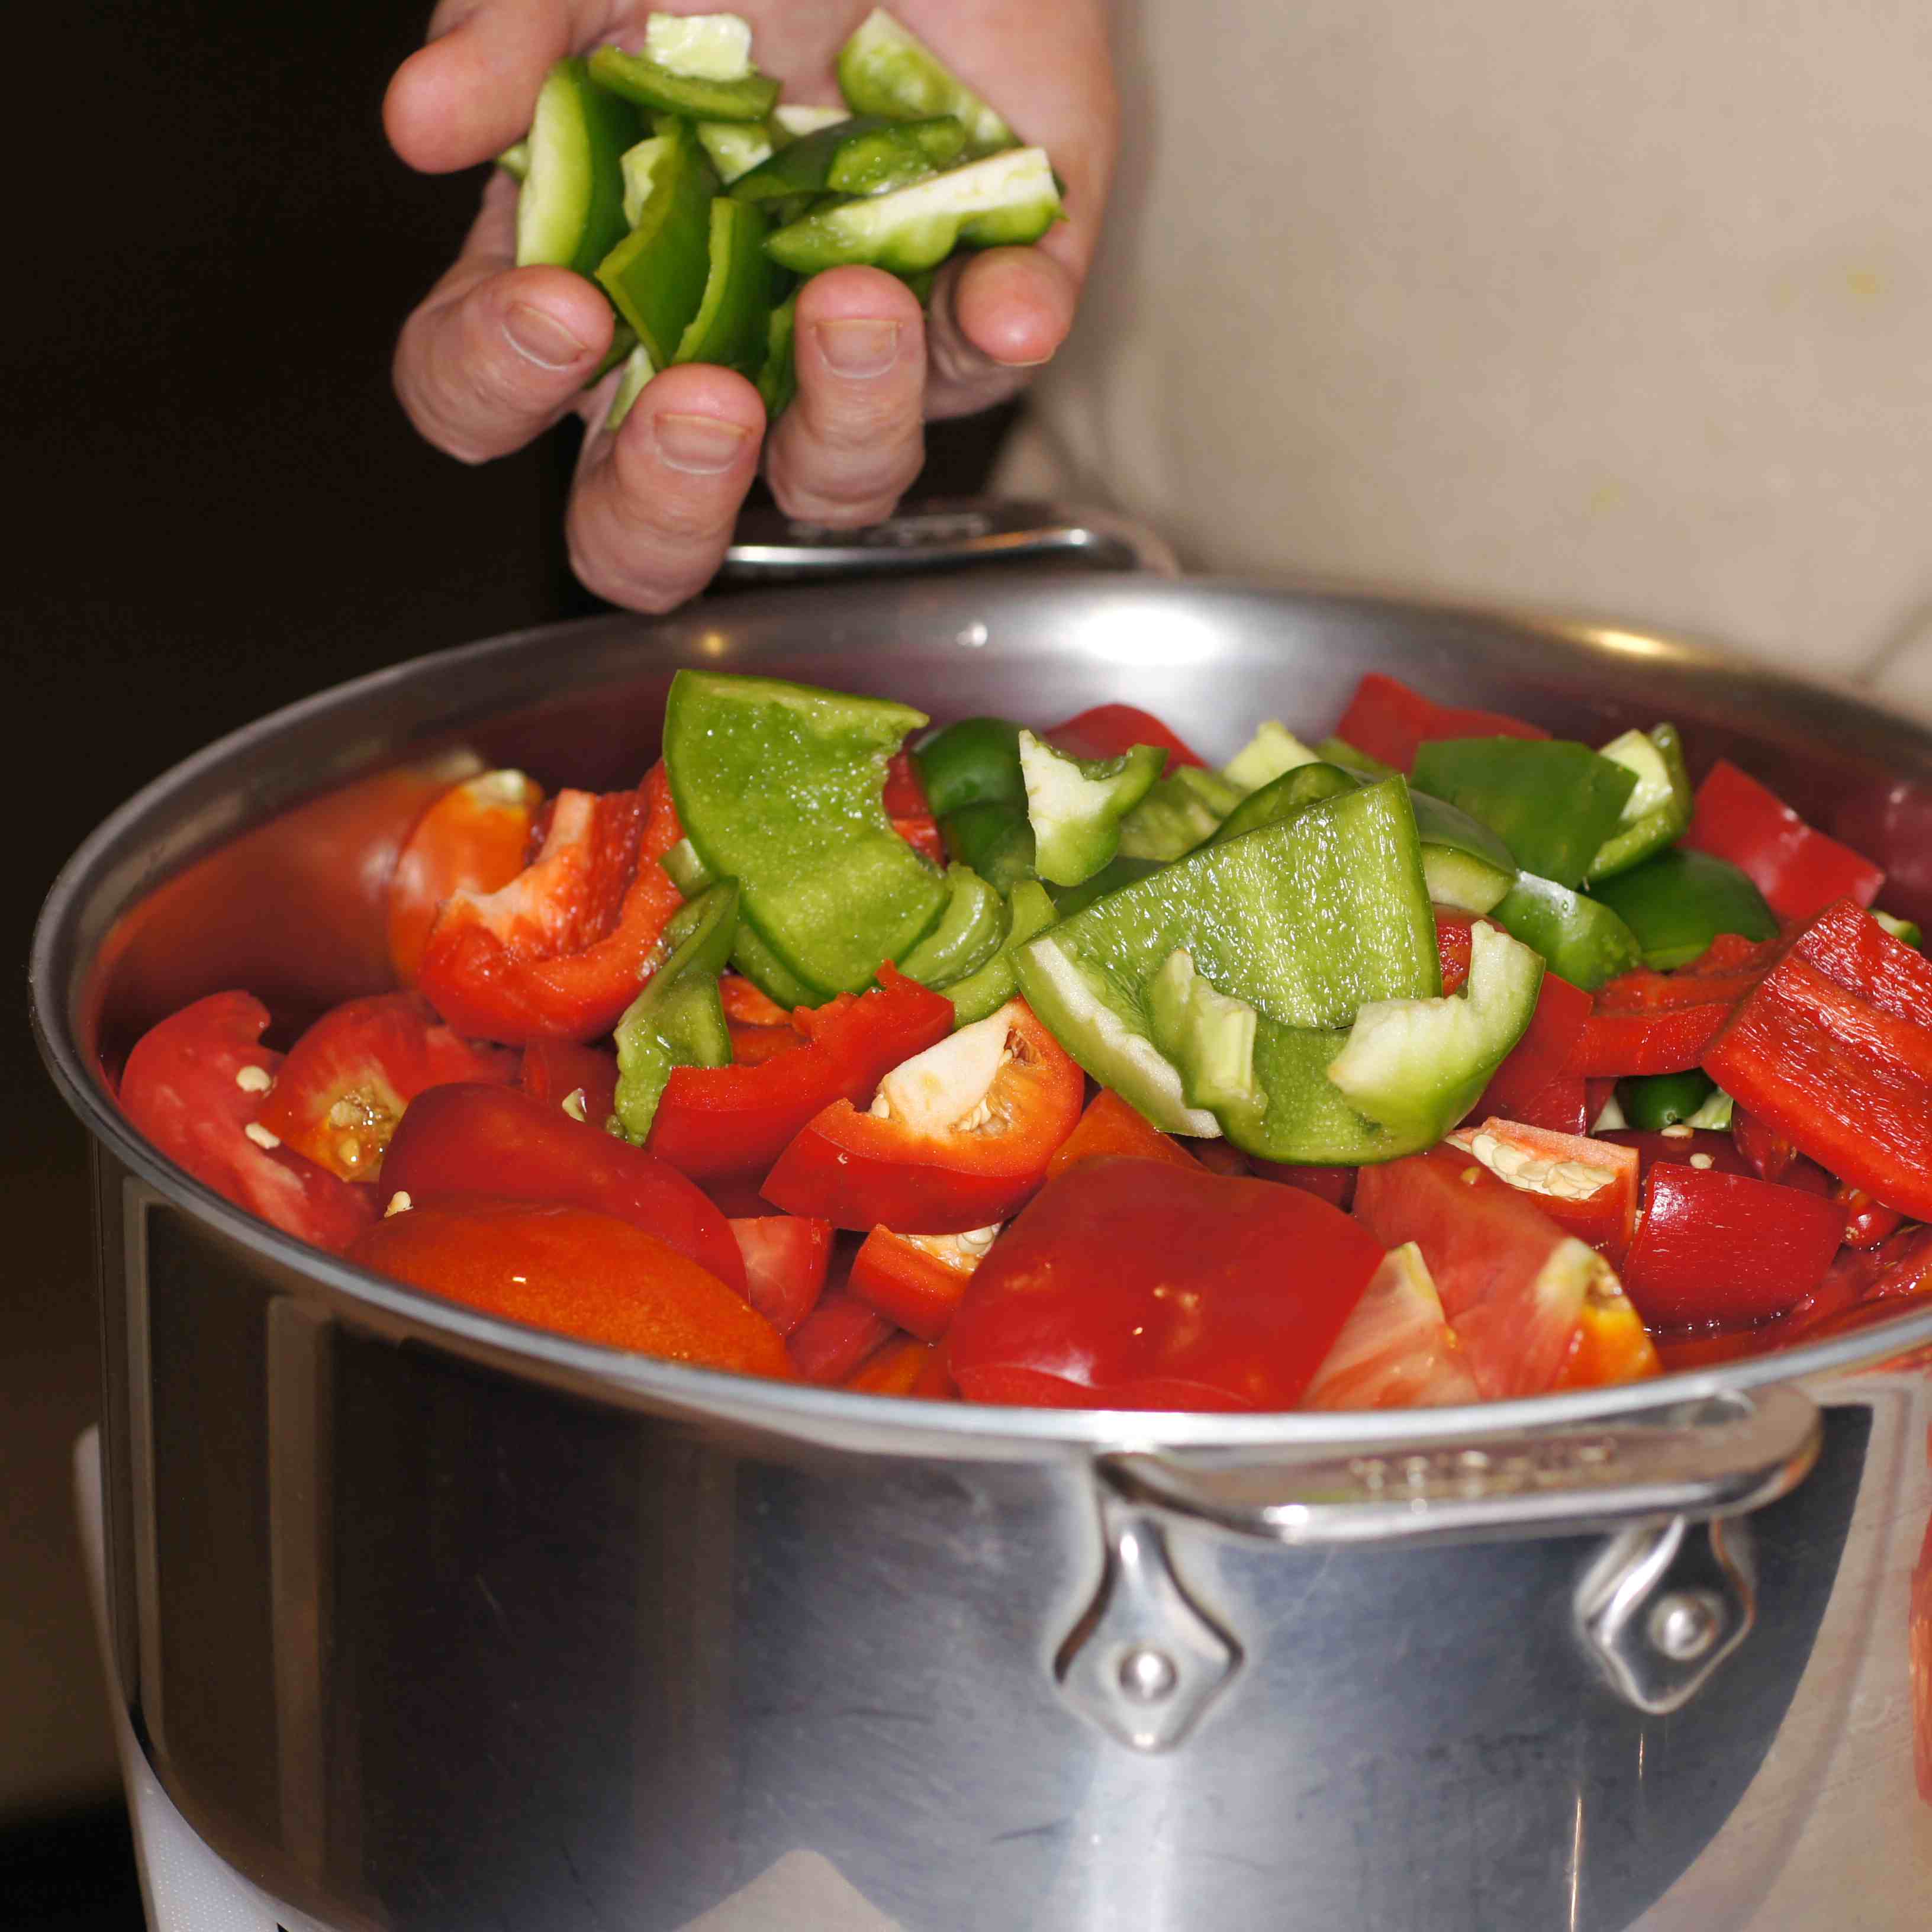
peppers

Serrano chiles

bell peppers
and onions

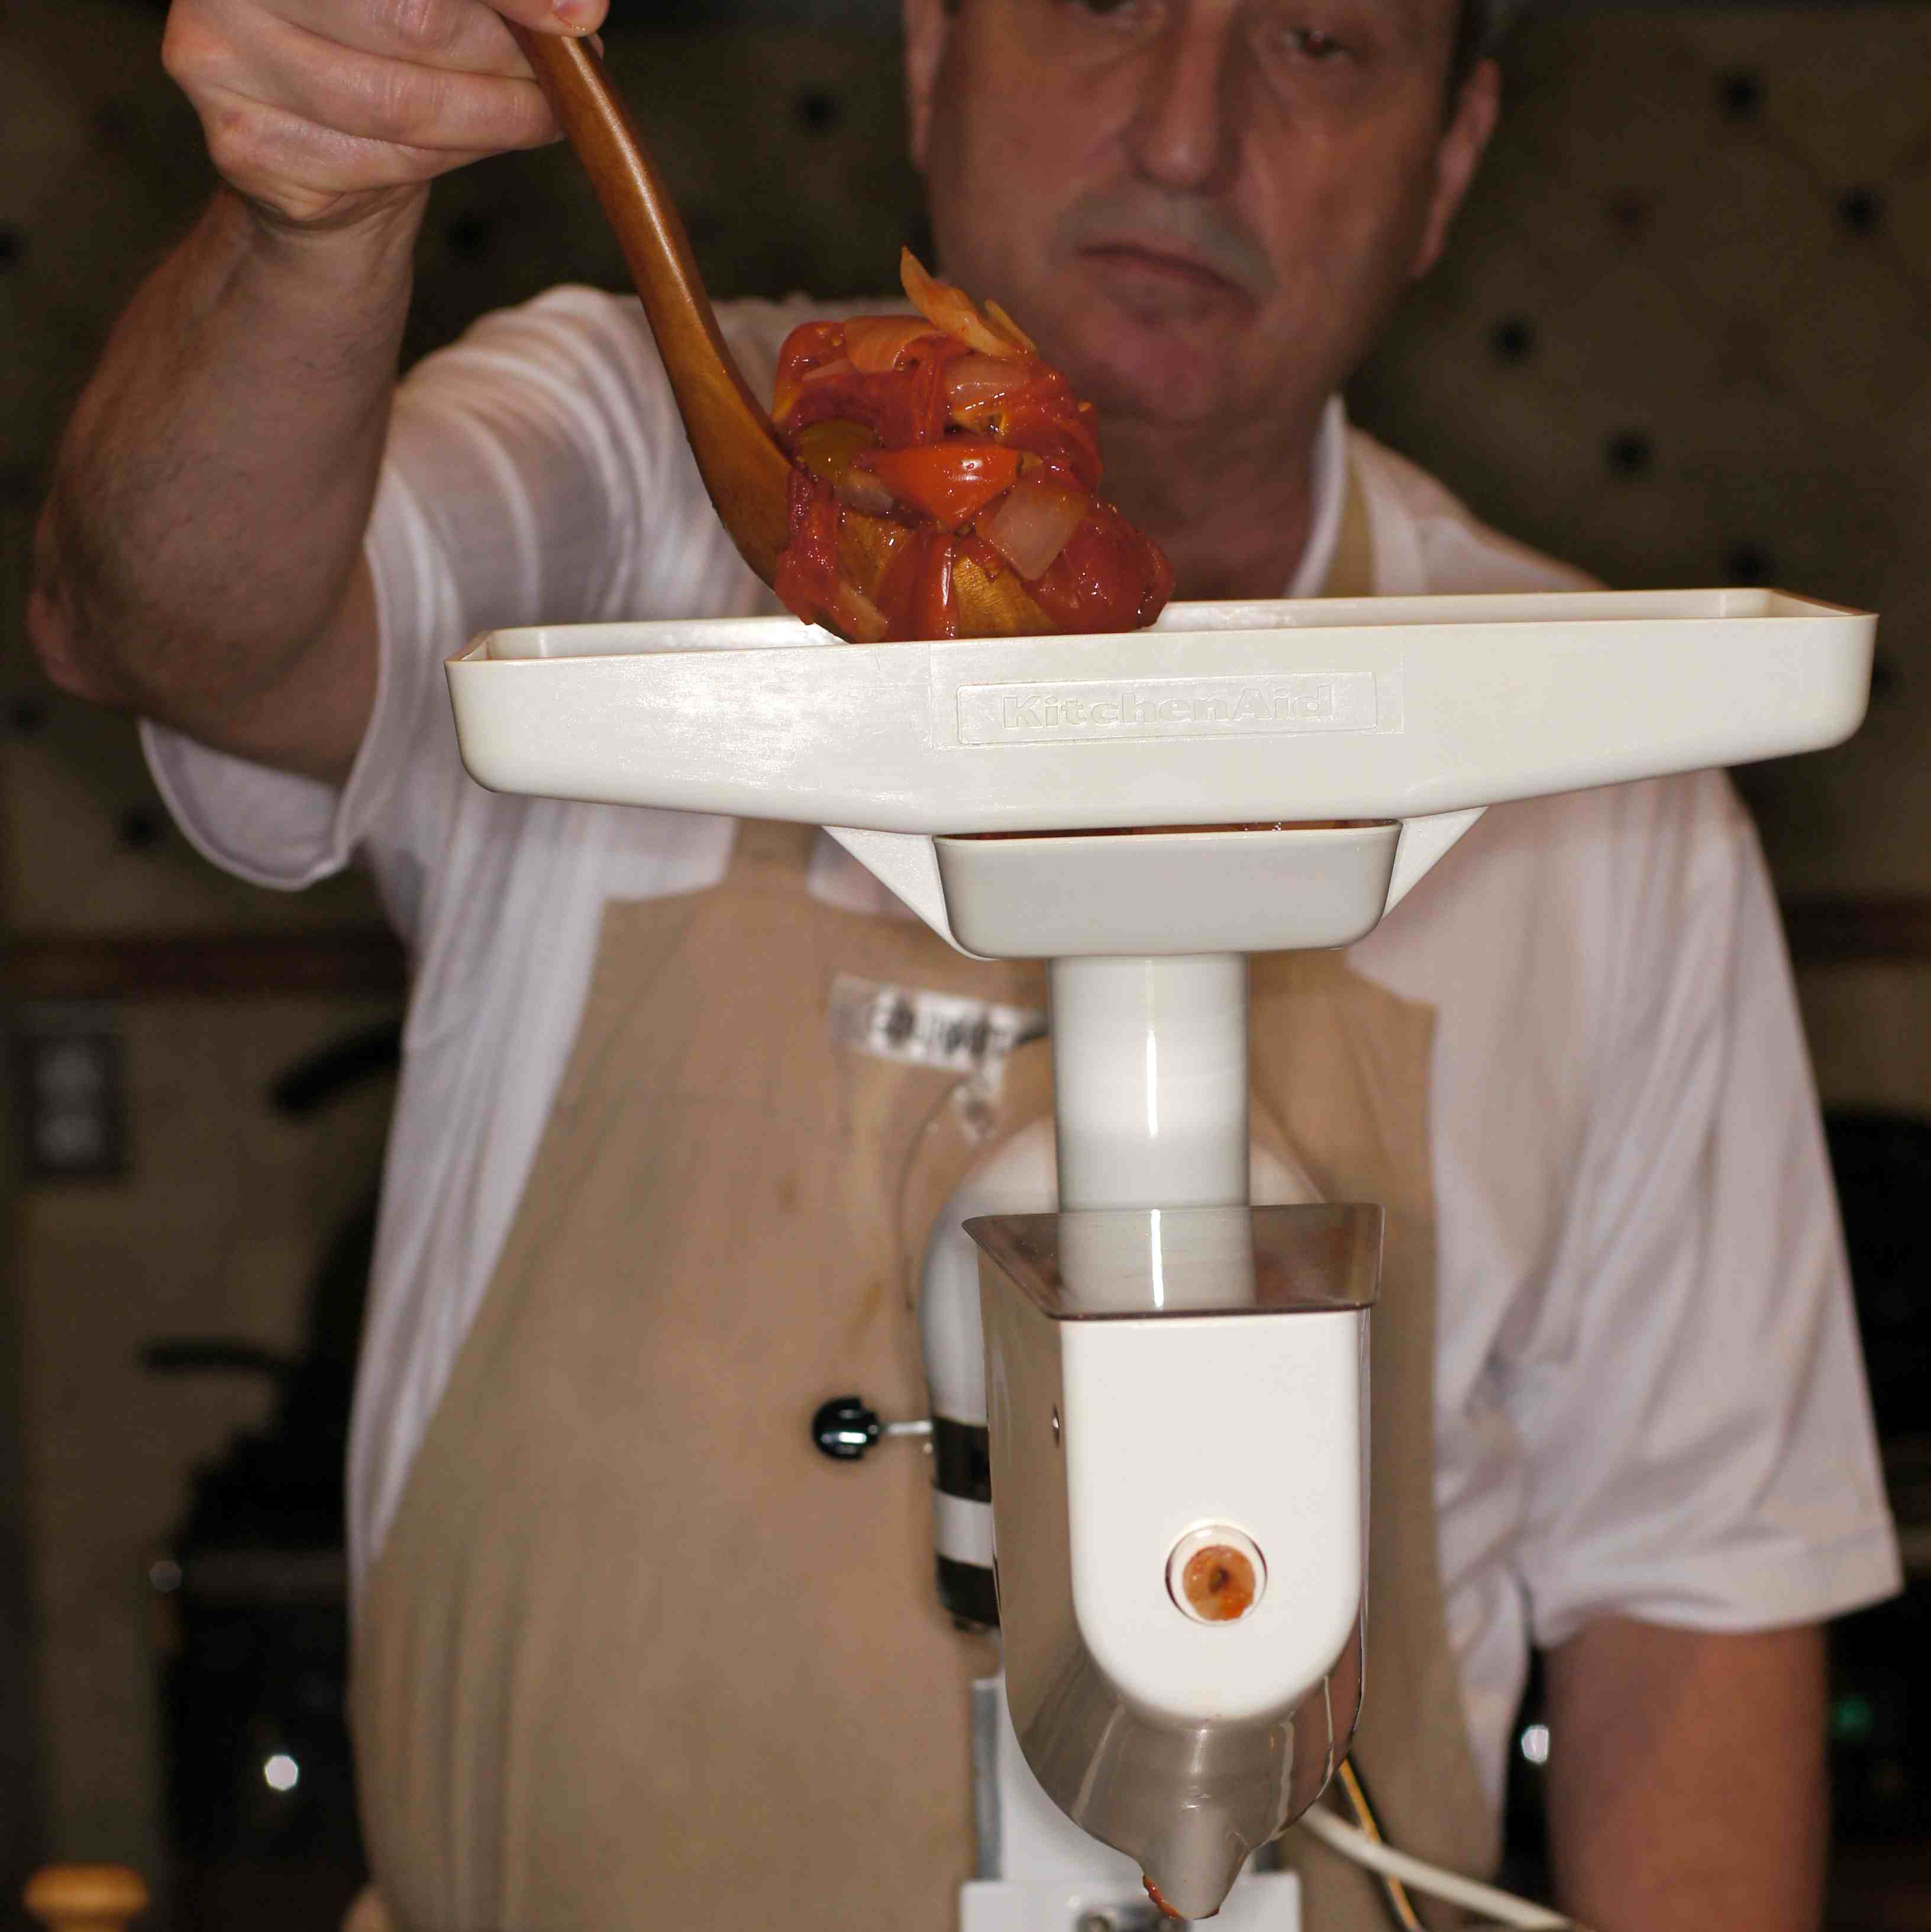
into a large, heavy bottomed pot. Notice, I had to change pots because my trusty 8 qt dutch oven wasn’t big enough. 😮 This is the 13 qt dutch oven and it is pretty darn full at this point. Place over medium-high heat.

Bring to a boil, reduce to a simmer, and cook until the ingredients are all soft, 30 to 45 minutes. Once the tomato mixture has softened, pass it through a food strainer to separate peel and seeds from the pulp. This is just one of the reasons I love my 27 yr. old Kitchenaid stand mixer with the attachments. 🙂 If you don’t have a food mill/vegetable strainer attachment for your Kitchenaid or similar stand mixer, a molina (hand food mill) will work. If you don’t have a molina, then put the veggies in a blender in batches and run through a fine mesh sieve.
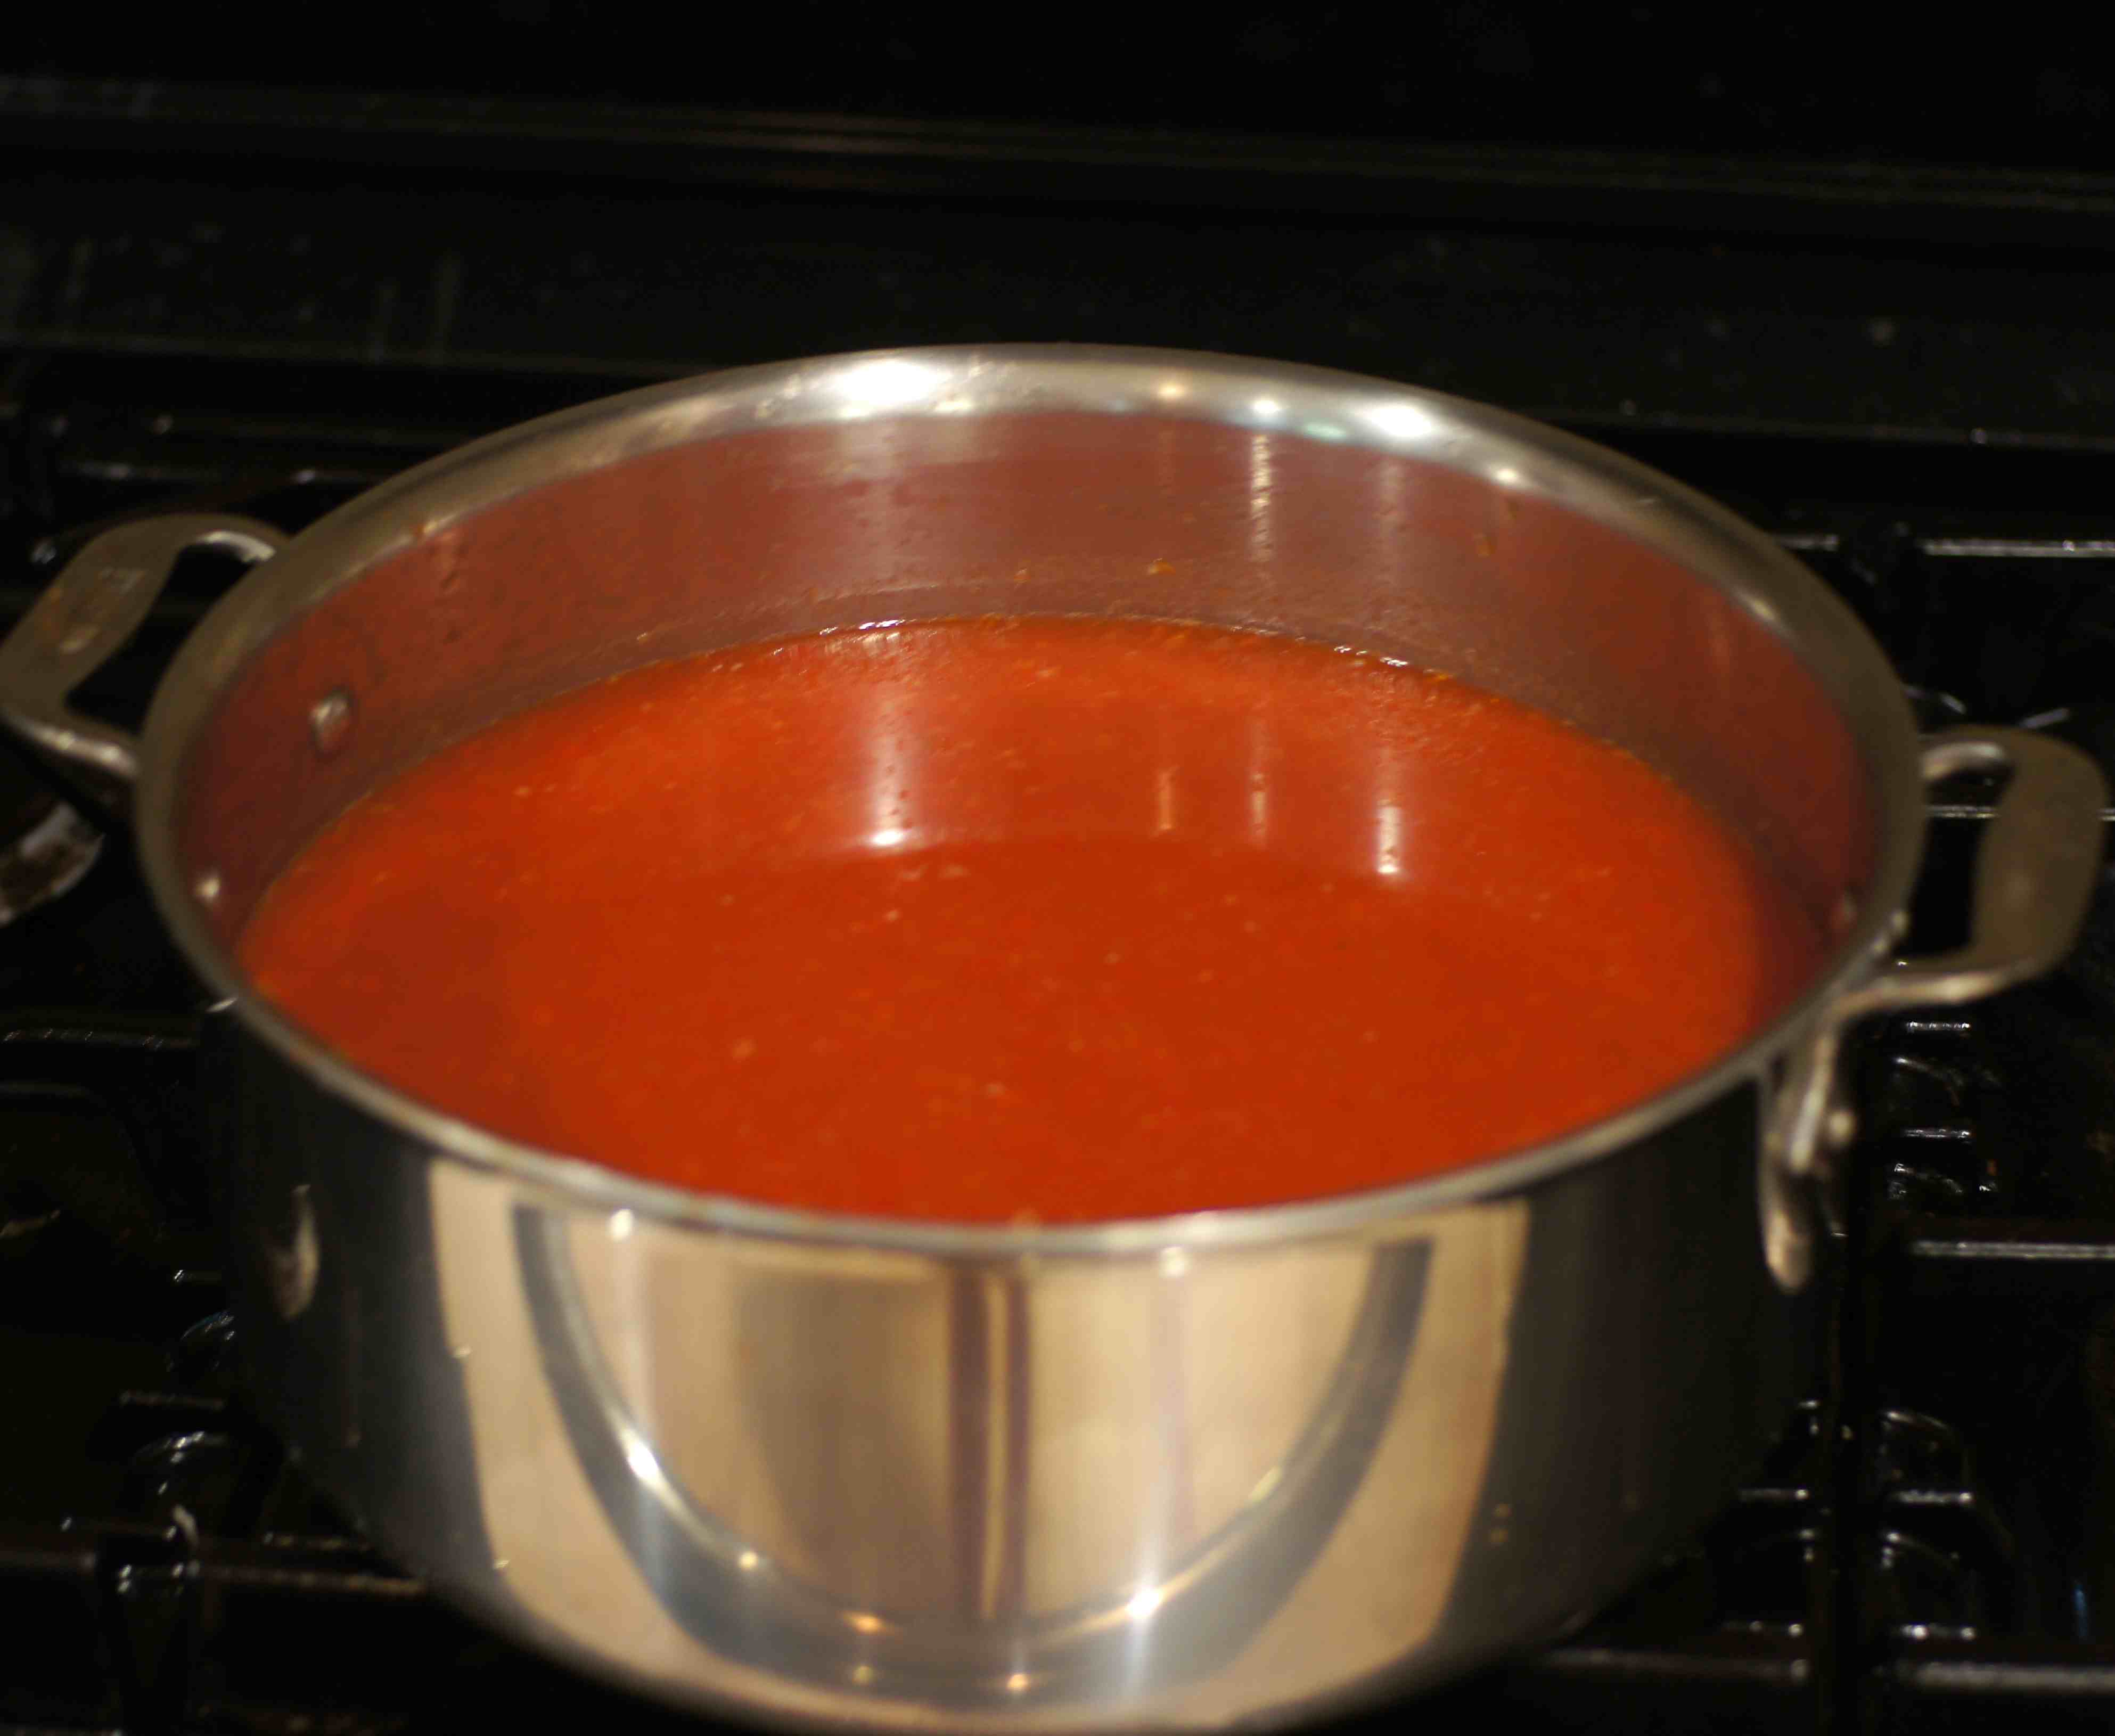
Return the strained pulp to the saucepan. The strained tomato/vegetable mix will be rather soupy at this point but it does have a lovely red color. 🙂
Now, add the brown sugar,

smoked paprika,
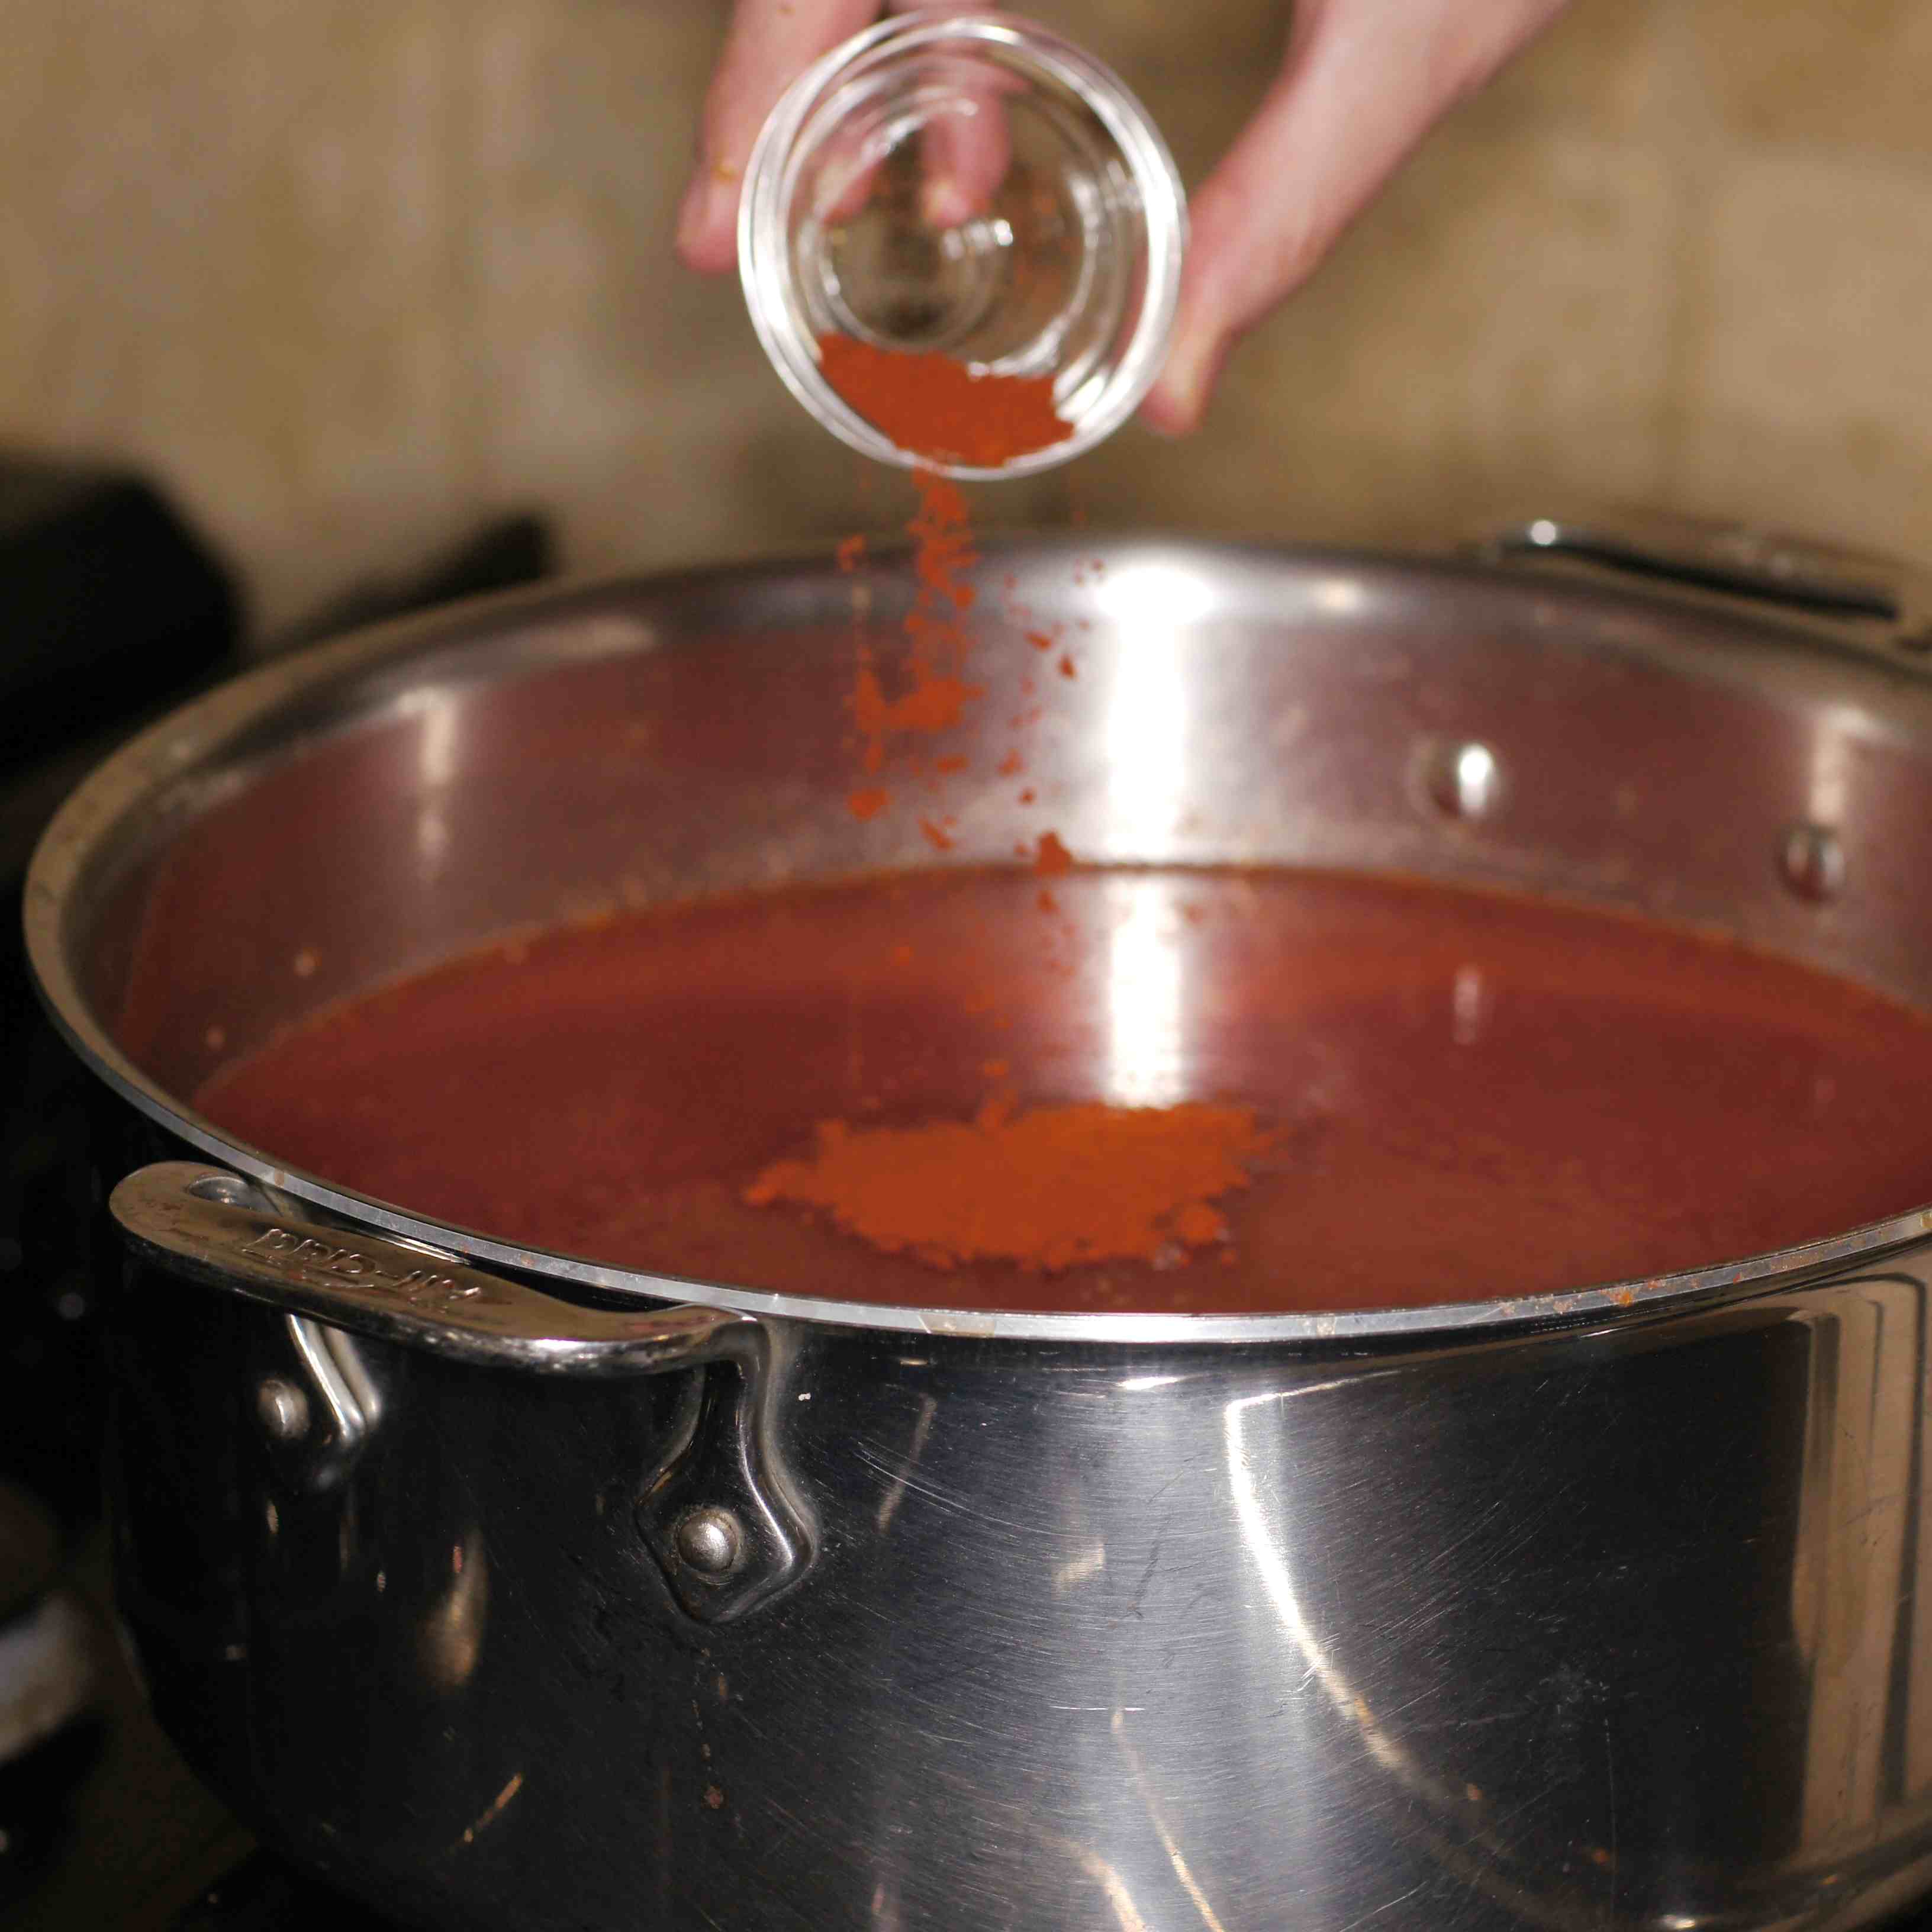
mustard,
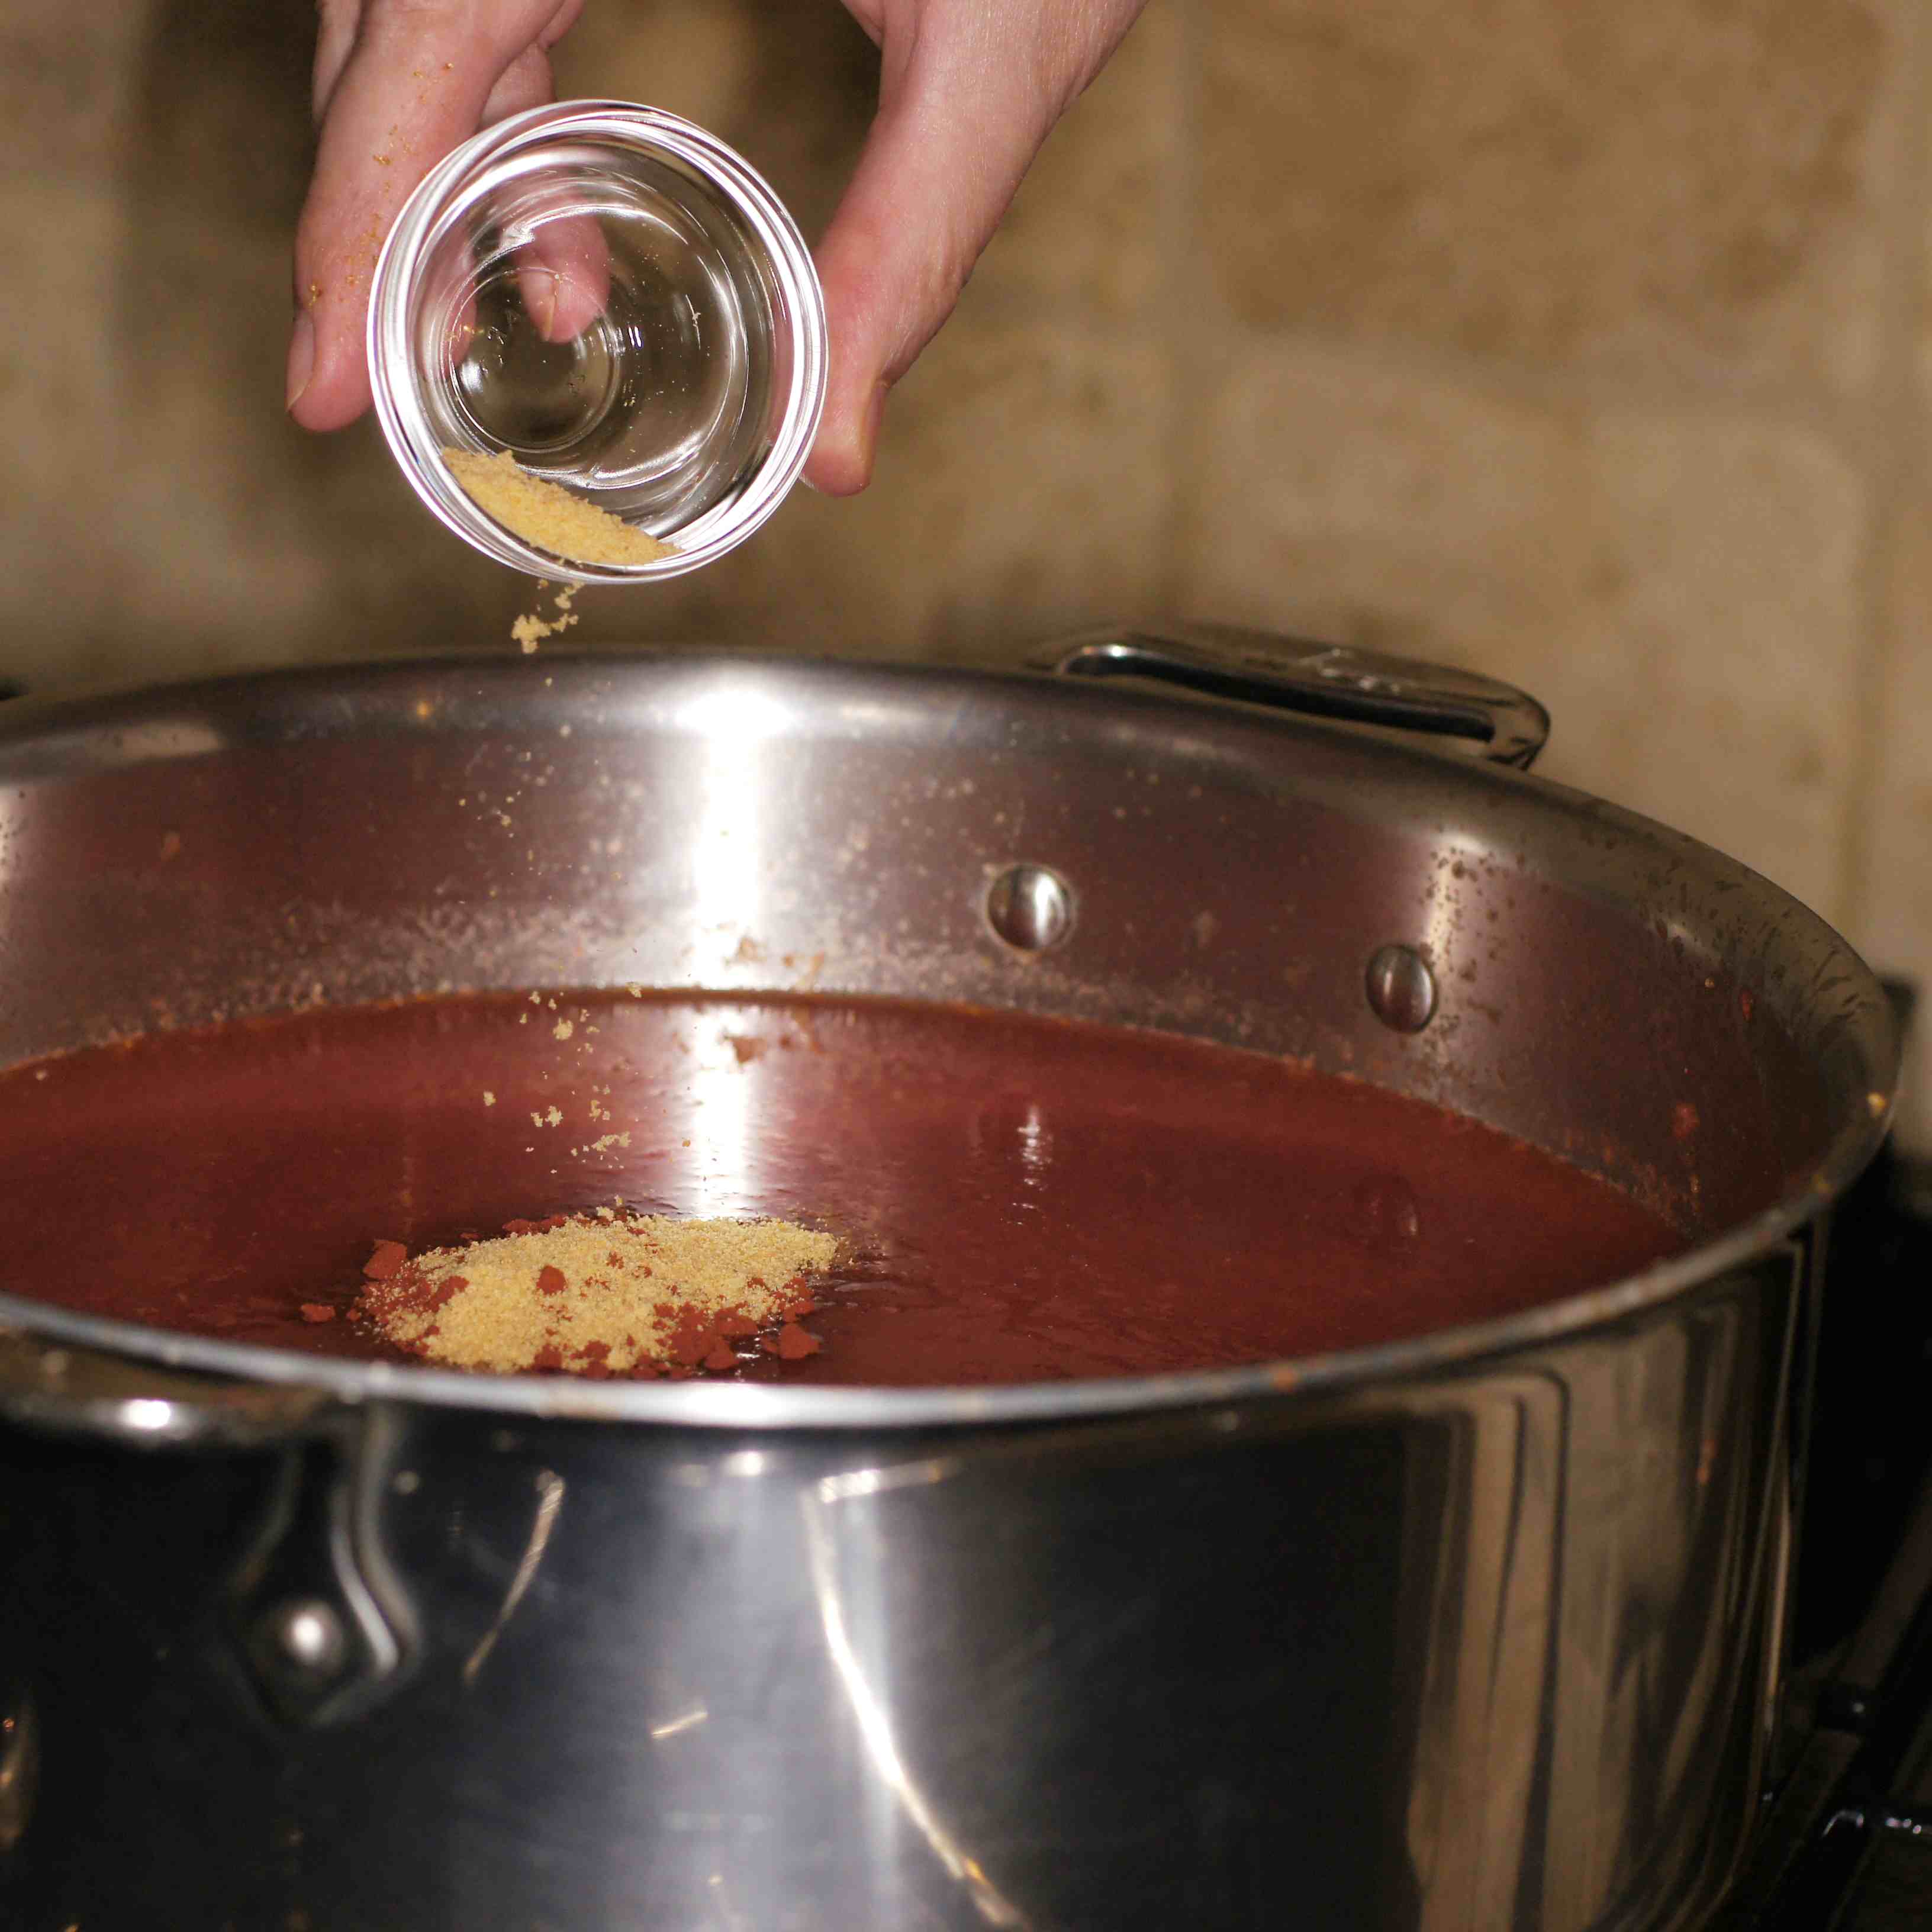
sachet of spices
and cider vinegar.
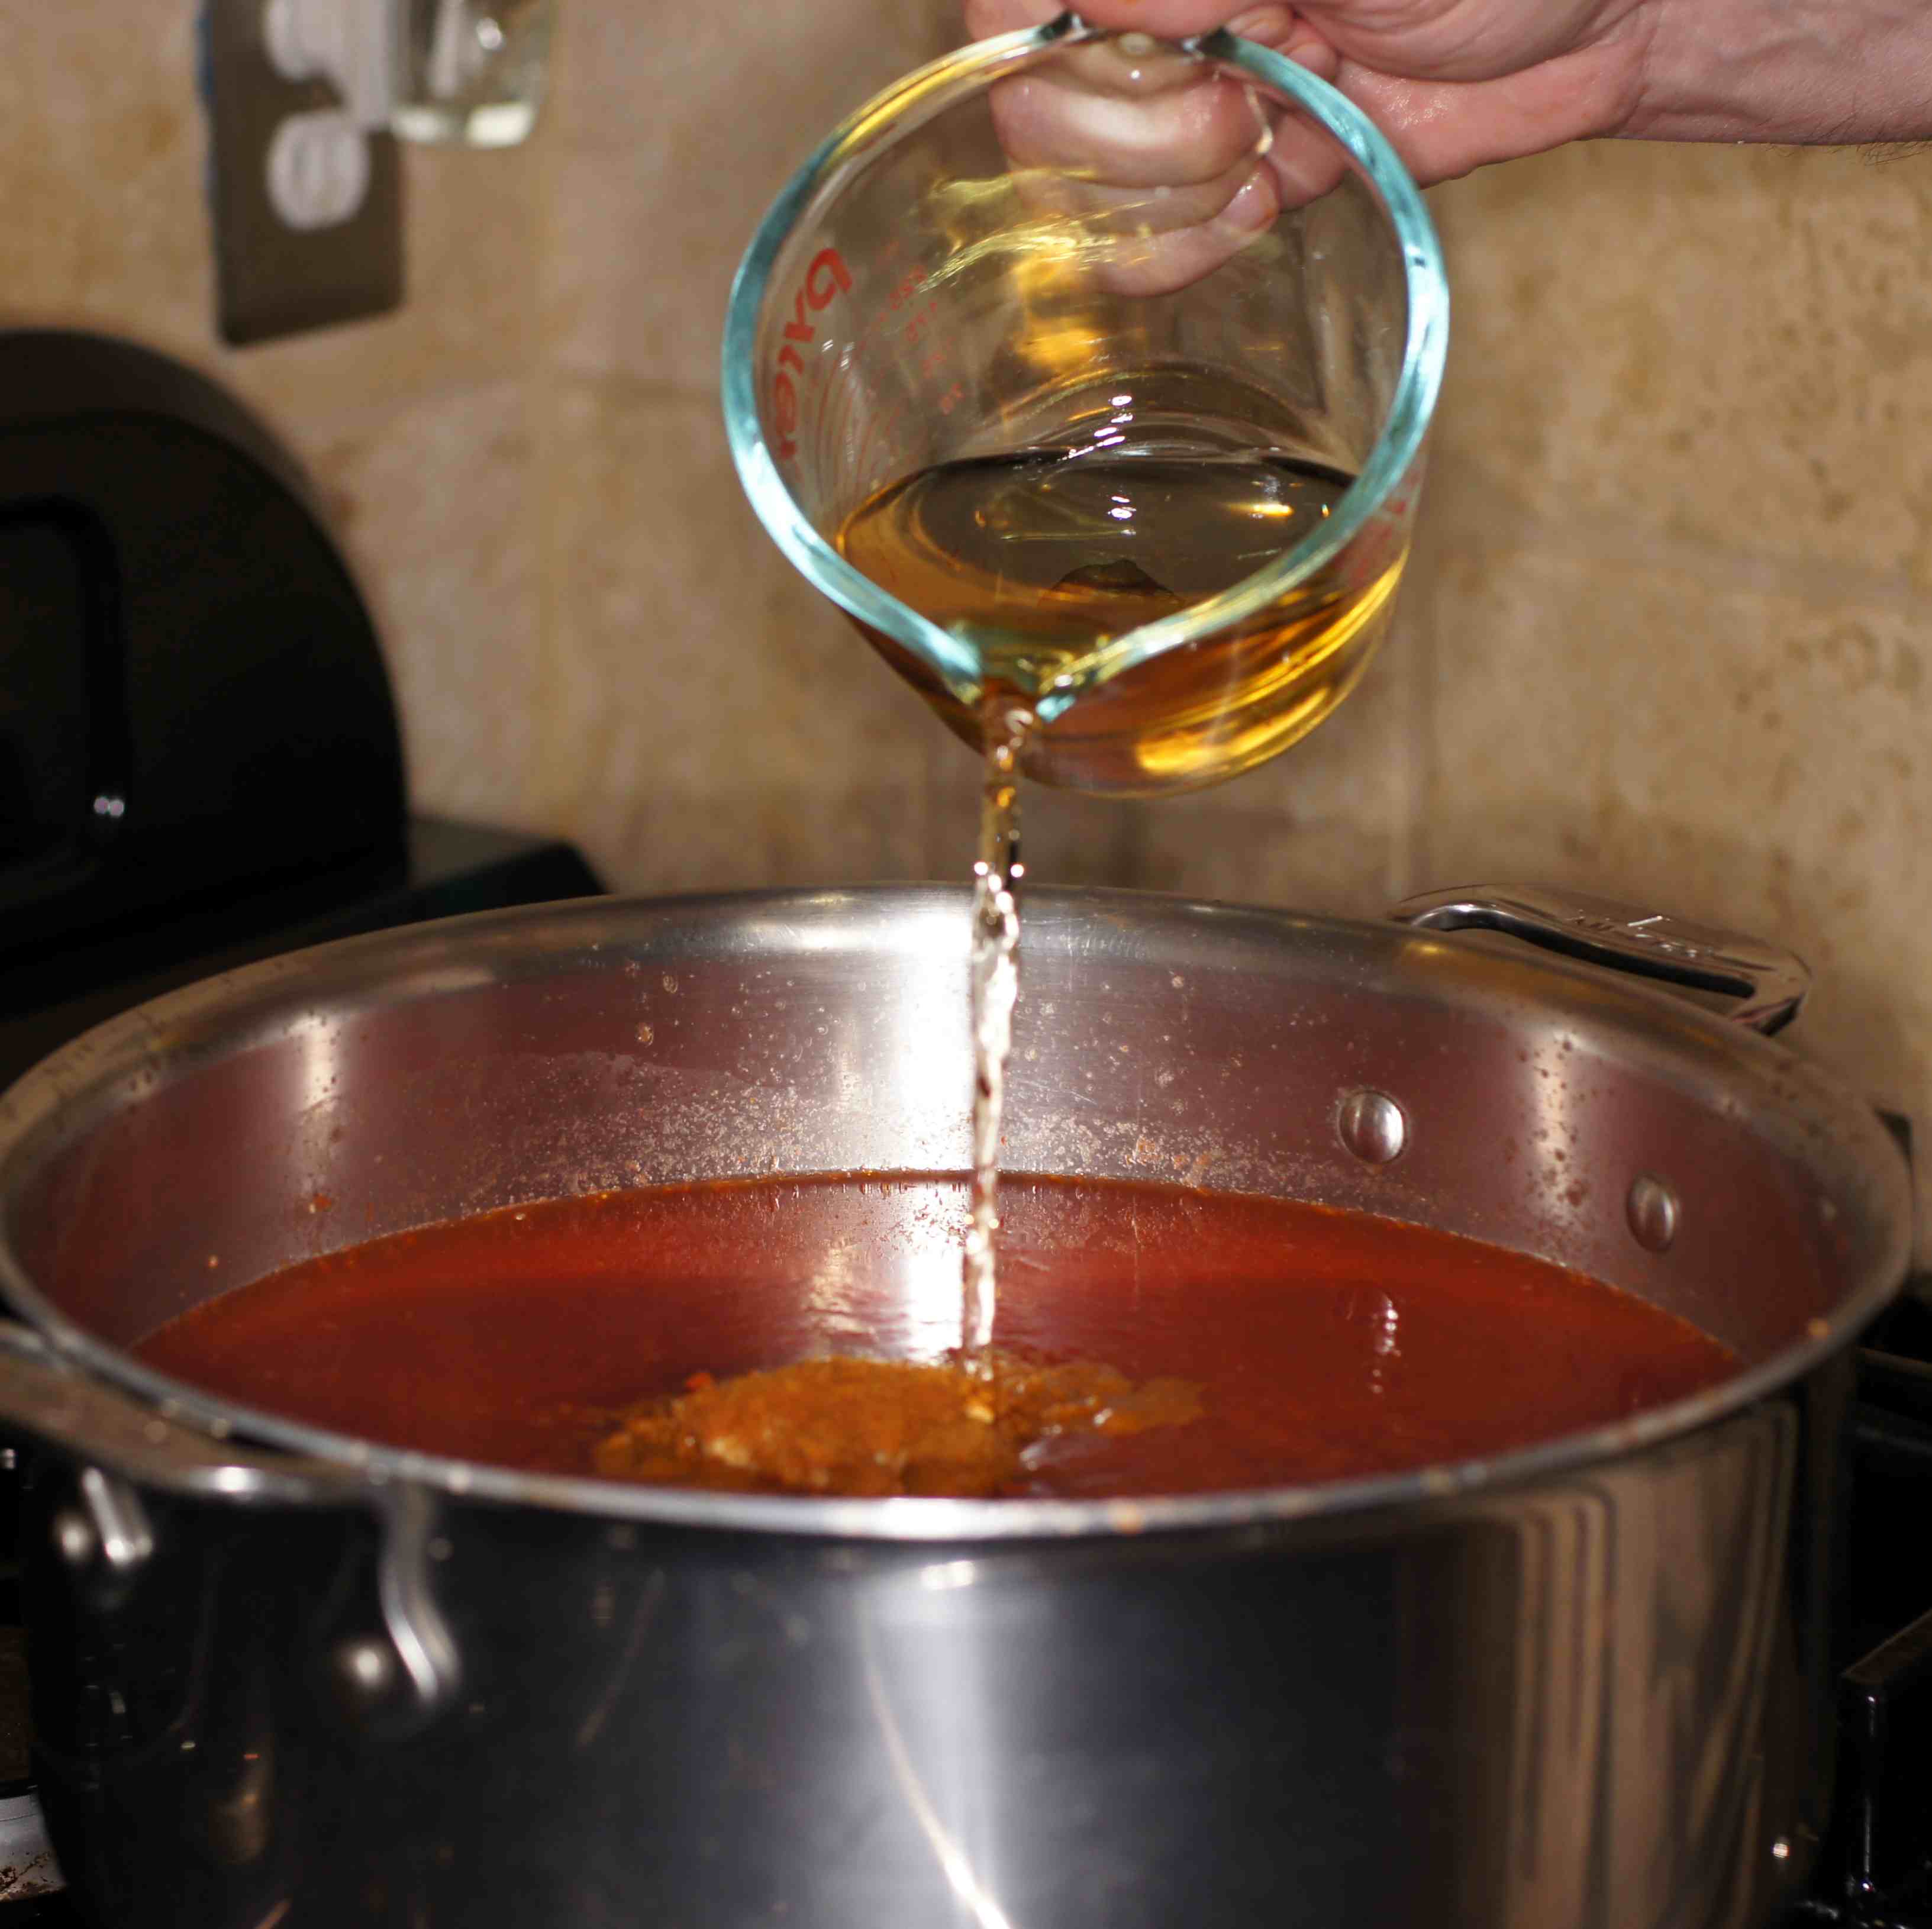
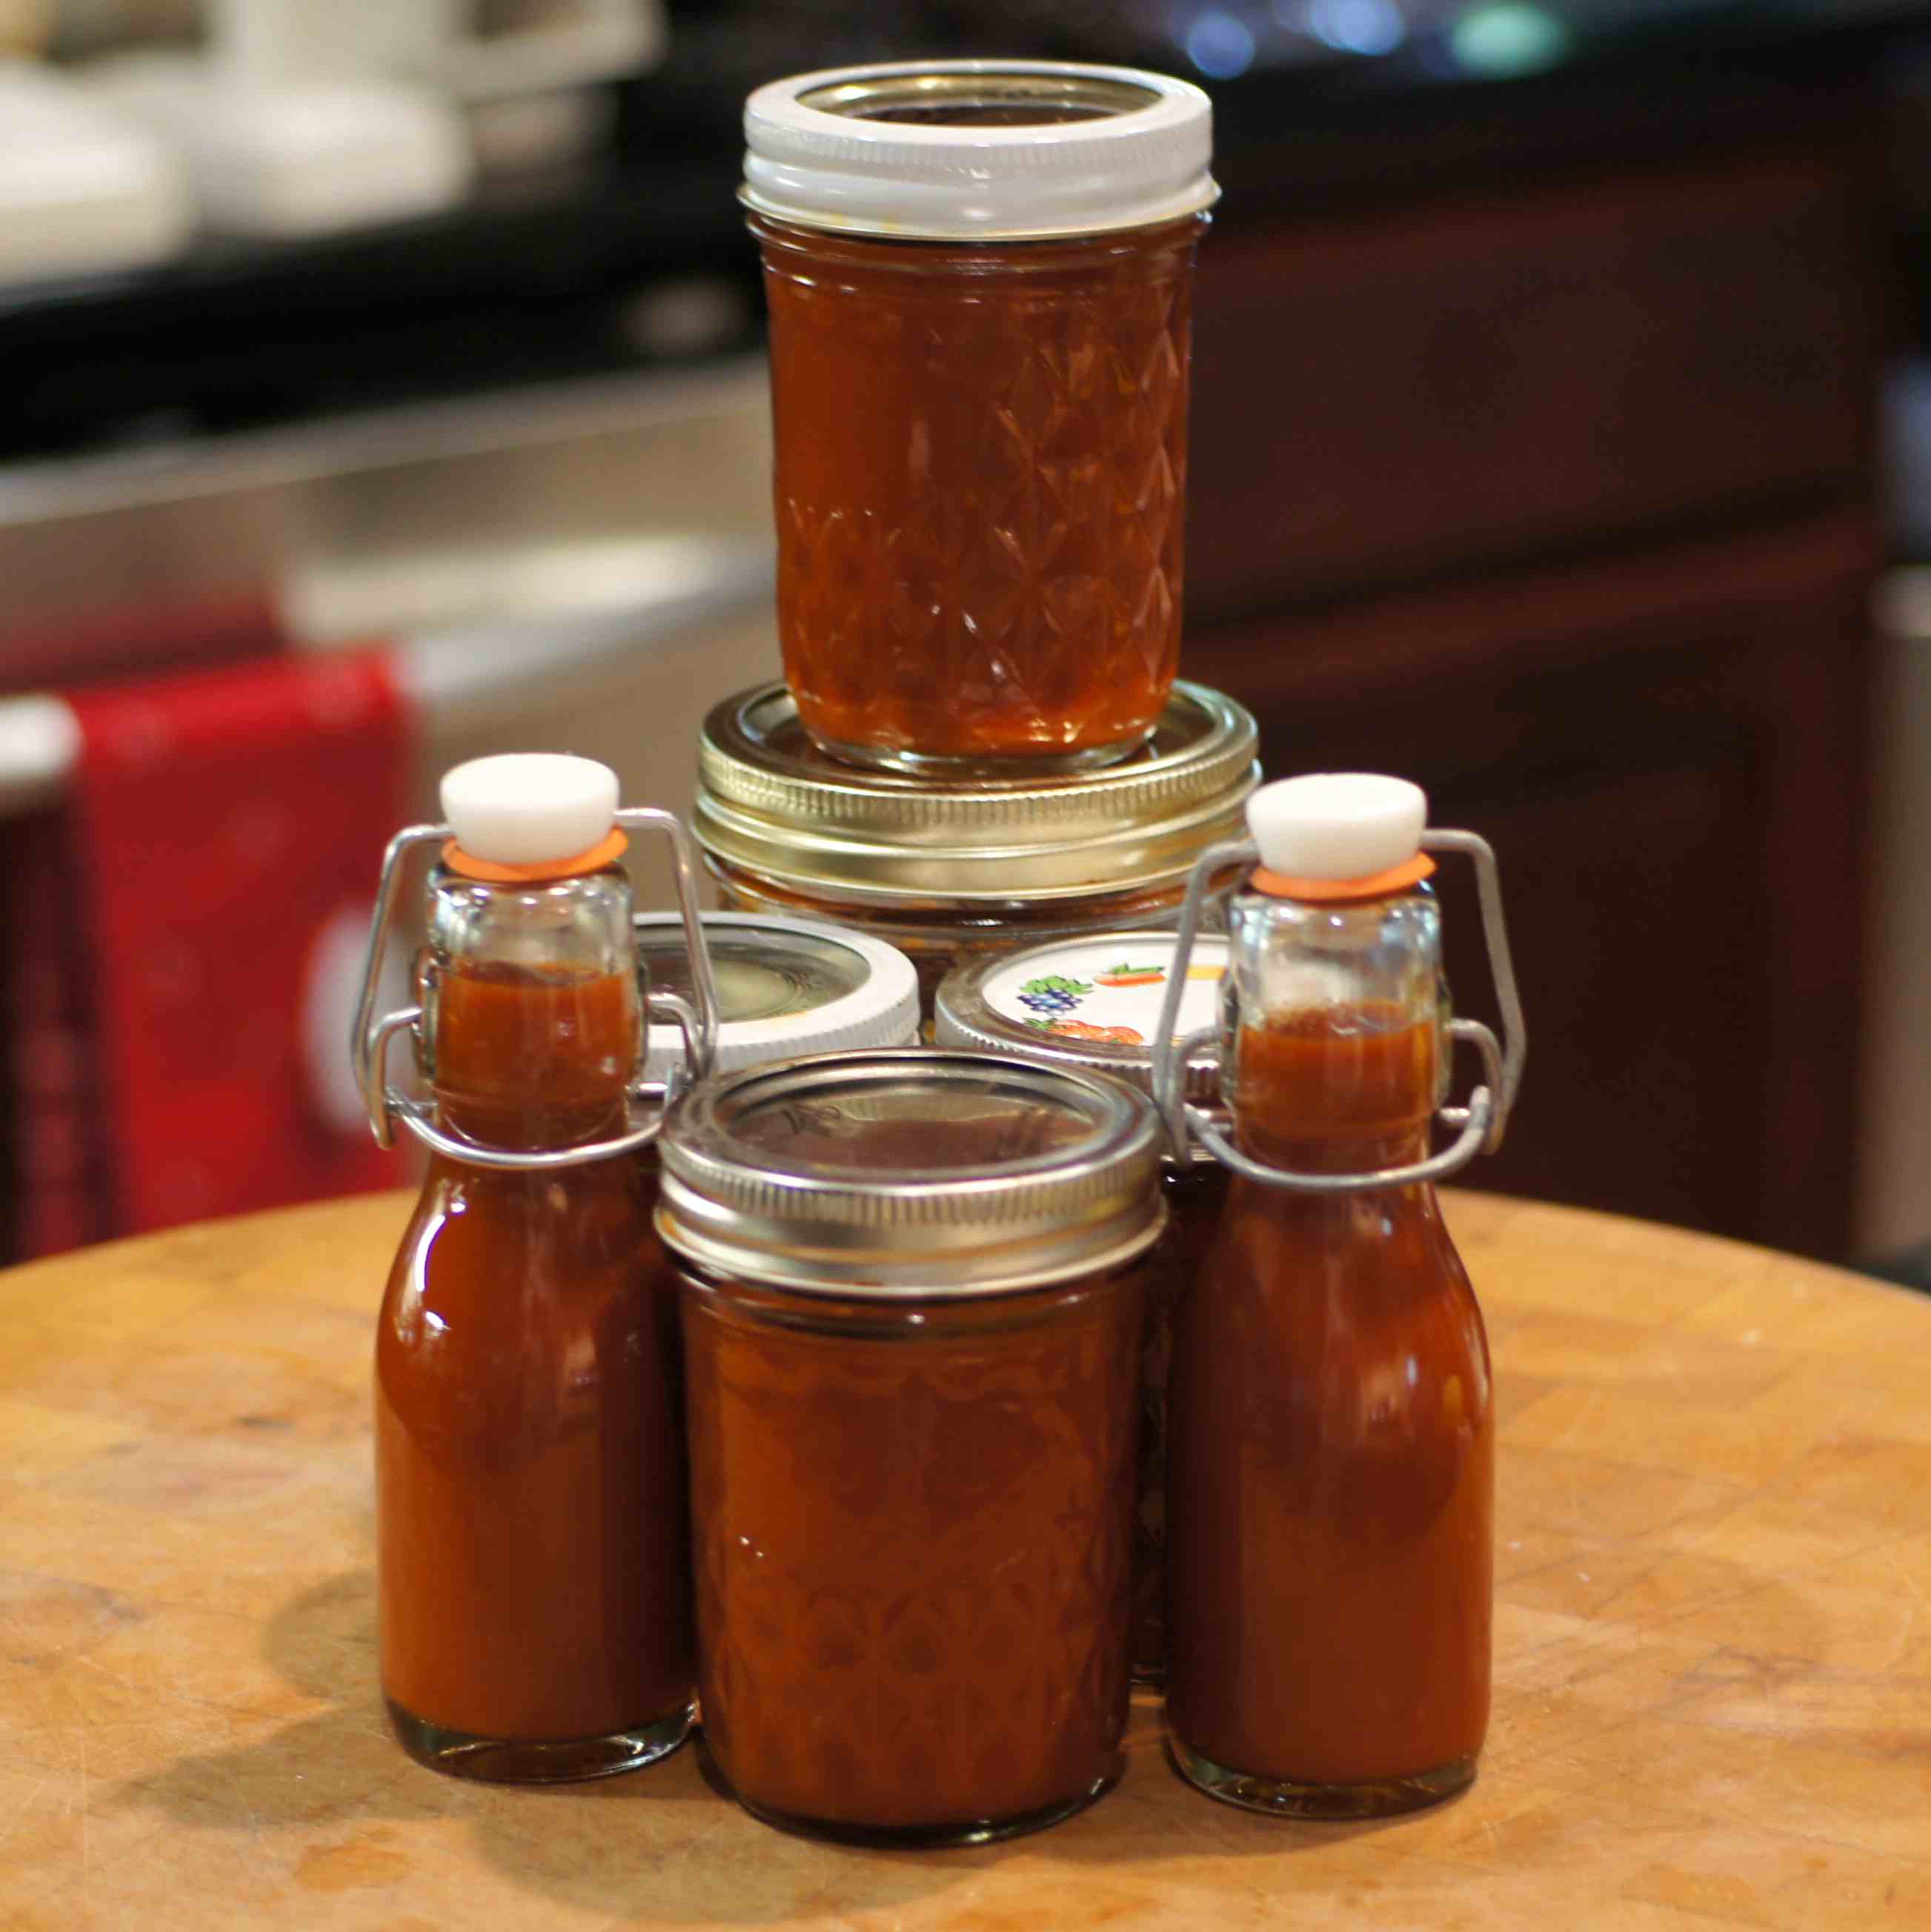
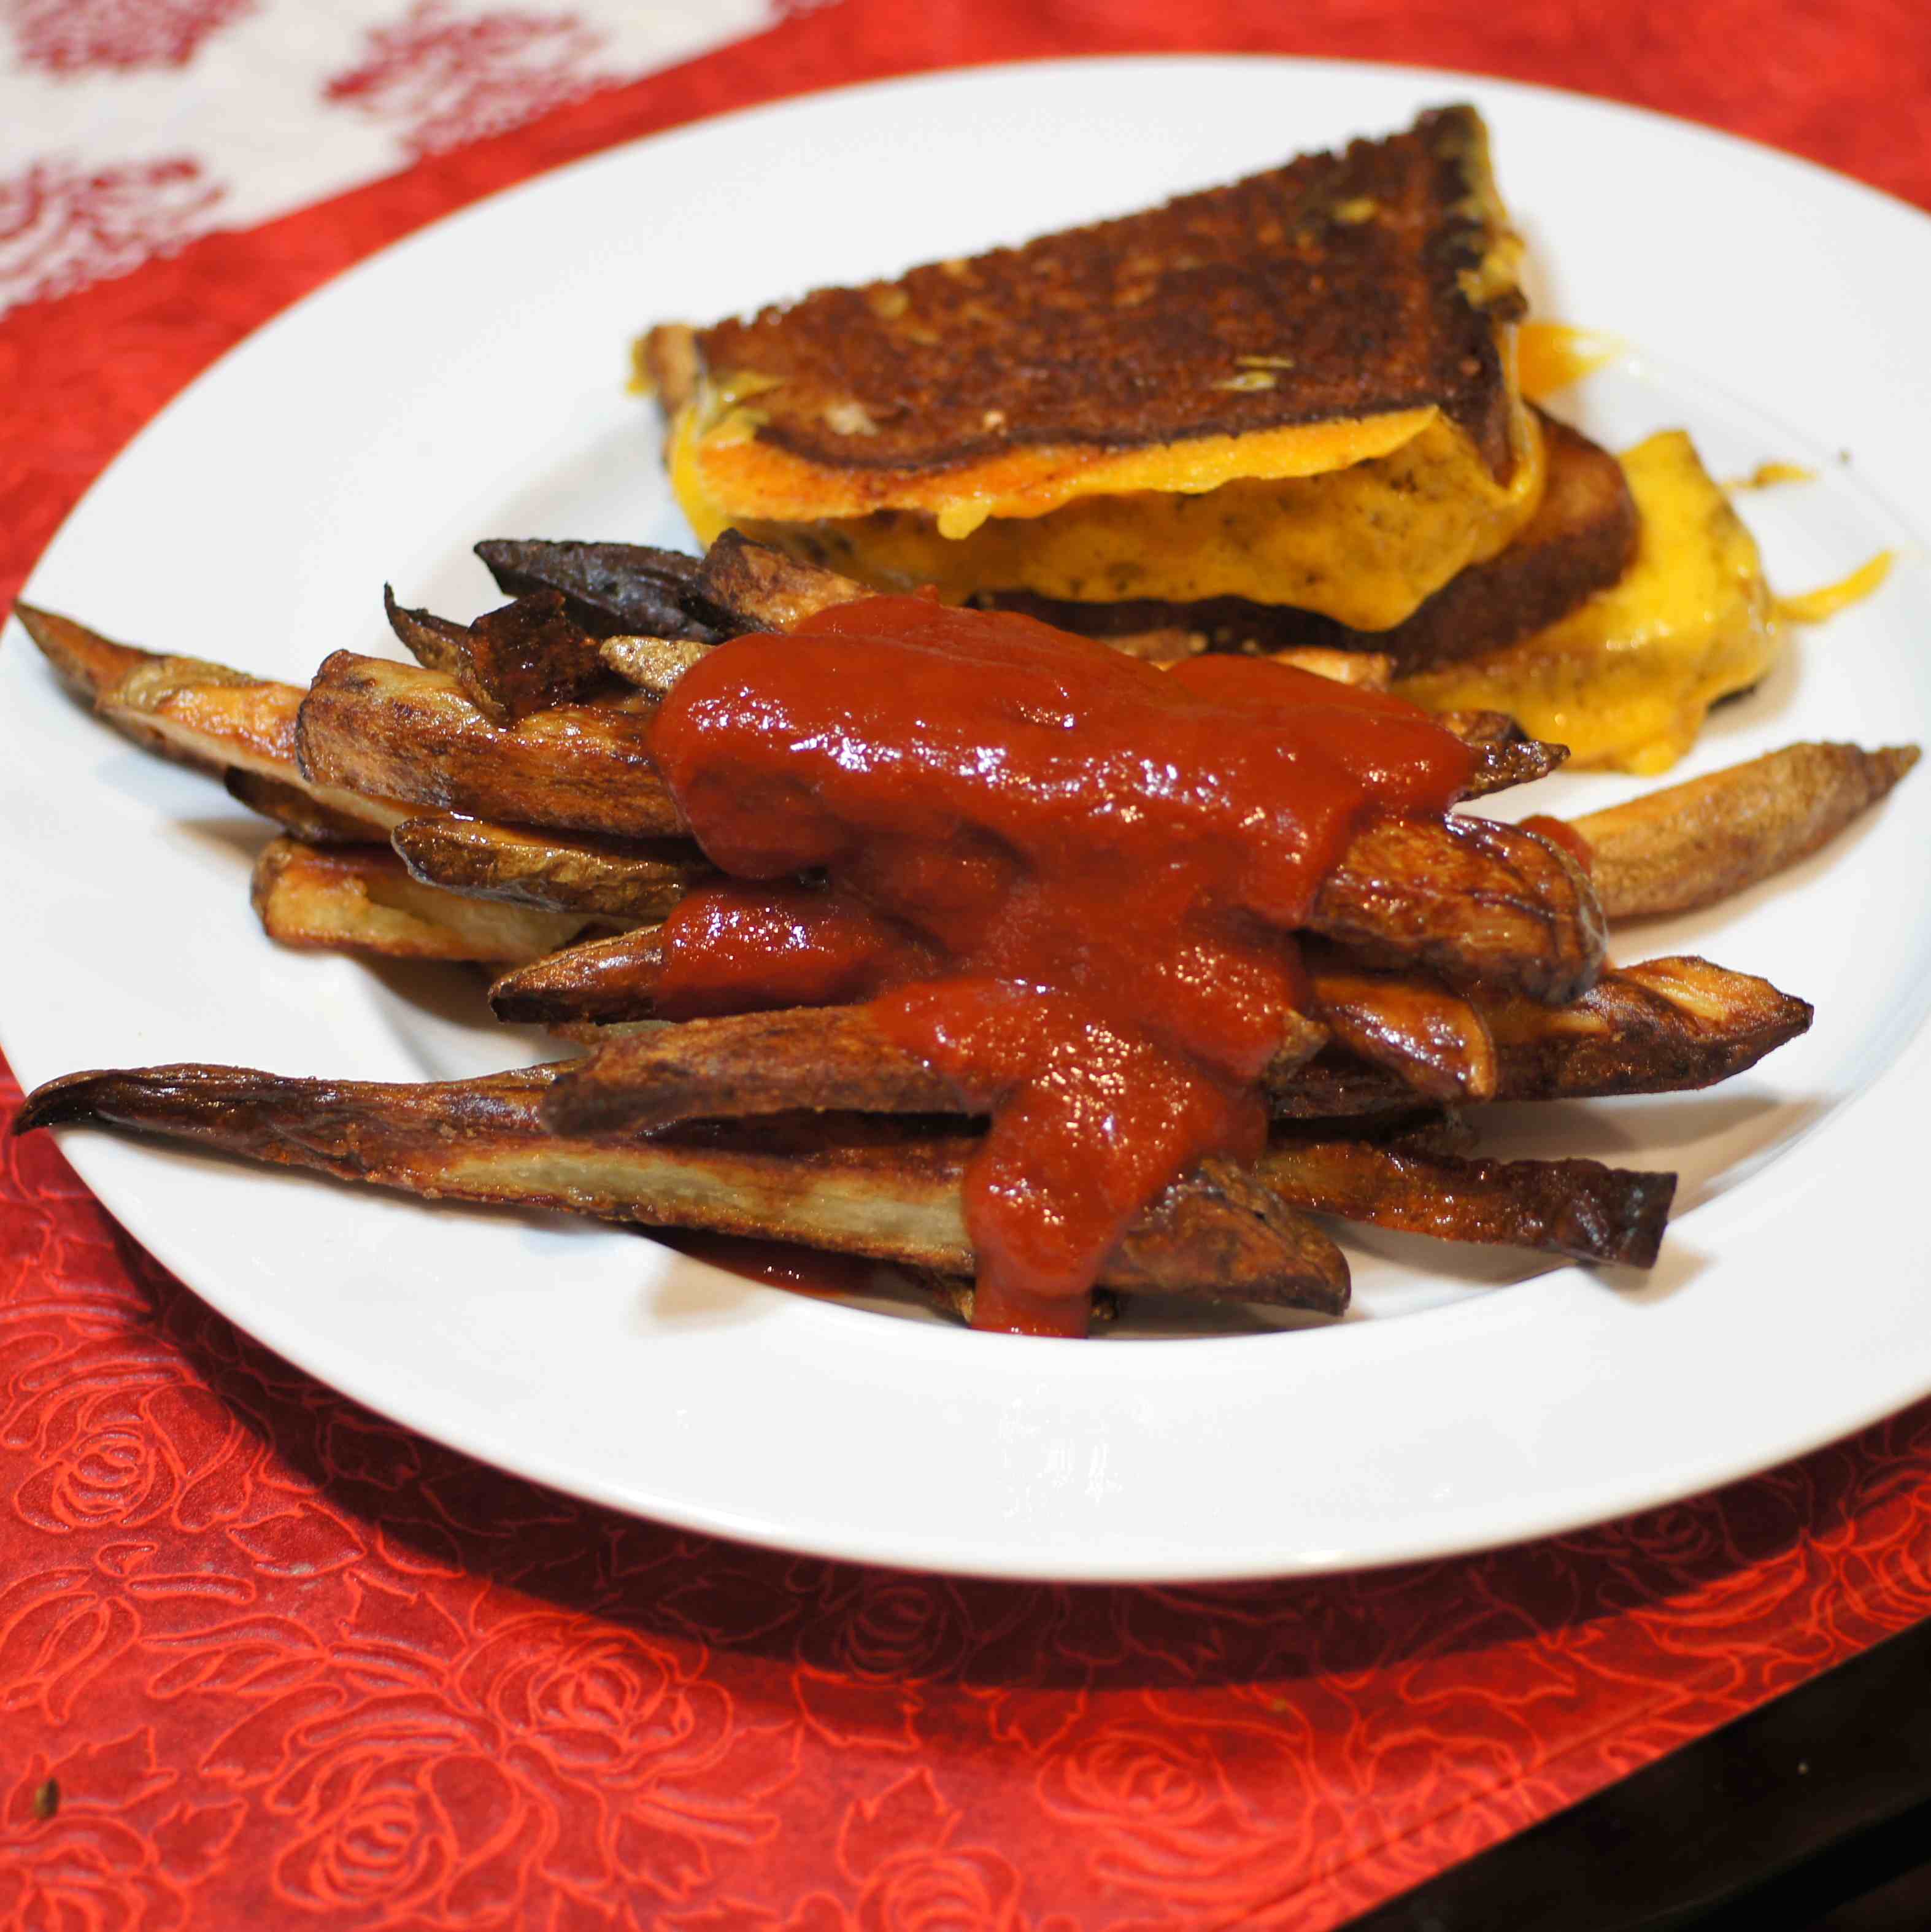
Stir to combine over med-high heat. Bring to a boil, reduce to a simmer, and continue for 45 minutes, stirring occasionally to prevent scorching. Remove the pouch. At this point, I stopped taking photos because they would be rather mundane and boring as they look pretty much the same. Continue to simmer until the ketchup has reached the consistency you prefer. This could take anywhere from 30 minutes to several hours. Realize that as the mixture gets thicker you have to stir more frequently. In fact, toward the end I was stirring almost constantly to prevent the ketchup from sticking to the bottom of the pan and scorching. It took me roughly 4 to 4-1/2 hours to get the ketchup reduced to the consistency I wanted. Also, toward the end, either run the mixture through a blender or use an inversion blender to get the texture you desire. Now that you have reached your desired thickness and texture, add cayenne pepper and salt, to taste. If you add these ingredients prior to the end, they will simply concentrate in the ketchup which may result in a ketchup too salty or spicy than desired. Once you have finished the toils of your labor, either bottle it for storage in the refrigerator, freeze it, or process it in a boiling water bath. If you are using pint jars, process for 35 minutes. If you are using quart jars, process for 40 minutes. Once it is cooled, fix a grilled cheese sandwich, a batch of fries and enjoy!!! 😀

Oh my, this looks amazing. And our tomatoes are starting to ripen. Imagine that. 🙂
It’s a great way to use a lot of tomatoes. 🙂
And because we did it right this year we have a ton ready to ripen.
Looking forward to a lot of tomato posts, then. 🙂
Oh the pressure! 🙂 Yes there will be some…
I wanted to make some homemade ketchup! Thank you!!! 🙂
Your ketchup looks great!!
Thanks. We liked it. 🙂
I want some of those little glass dishes – they raise the ingredient presentation bar to a completely new level
The little bottles are fun and a nice touch to presentation. 🙂 I bought them when I was making hot sauce and giving it to friends for Christmas. They are great. 🙂
One of these days I’m going to learn how to read. 😮 I initially thought you were talking about the little bottles, which I really like. Silly me.
The little glass dishes we use for ingredients (I think) we bought at Sur La Table. They are perfect for herbs and spices. We also keep the little caviar containers and use them, too. 🙂
I want to do this! I think Lowcountry tomatoes will work great. GREAT post Richard!
It’s fun and the ketchup is so much better than commercially prepared. You get to season it the way you like it. Just remember, even though it may taste really spicy by itself, it will never be served by itself. This could have used some more chile. 🙂
Thanks for the tip!
OK!! Did a big supermarket shop yesterday . . . stop. Winter is not precisely tomato time here . . . stop. Surprised to see big bags of Oz tomatoes at a give-away price . . . stop. Bought same wondering what I could do with such in hurry: did not look as if they would last too long . . . stop. Now I know, don’t I : . . . stop! Delighted with the outcome, since have every item needed at home . . . final stop 😀 !
Hi, Eha. Sounds like you have a great find all the way around. This was fun to do. 🙂
This is so impressive. I really want to make homemade ketchup. And this only has 3/4 cup dark brown sugar in the whole pot! Brilliant. Thank you for such a wonderful post. It looks like it was quite a task.
Thanks for the very nice compliment. 🙂 It is somewhat time consuming but was fun to do and I will definitely do again as it was worth the effort.
I’ve prepared this from John’s blog, but sadly didn’t take pictures. Really liked the result, and as like you I don’t use ketchup often I still have some. Great to make this with fresh tomatoes at their peak!
Thanks, Stefan. Part of the fun of the blog is seeing other people’s recipe and styles and then trying them. This was definitely a fun thing to do with a very tasty result.
Agree completely!
This is very different from my recipe, so I will definitely try it! Thanks!
Thanks, Mimi. We thought it turned out pretty tasty. I need to try it with chipotles (I was considering using my pickled chipotles) because I love the smokey flavor of the chipotles.
I adore ketchup! I actually LOVE IT on spinach 🙂
Thanks, GiGi. Ketchup with spinach is a new one for me. 🙂
Finally got here! Like you, Richard, I’m not much of a ketchup user but I find that I use this sauce frequently. My friends and family all love it, too. At Christmas a bottle of ketchup is now a permanent fixture in each of their gift baskets. Yes, it’s popular!
Thanks, Richard, for the shout-out. I really am glad that you tried and enjoyed the recipe.